


Azure Databases: REDCap Prod V8 Upgrade
Step 1: Get Prod login credentials
- Prod Username: i2admin
- Password: i2-redcap-prod-admin-password
Step 2: Set Environment variables for MySQL
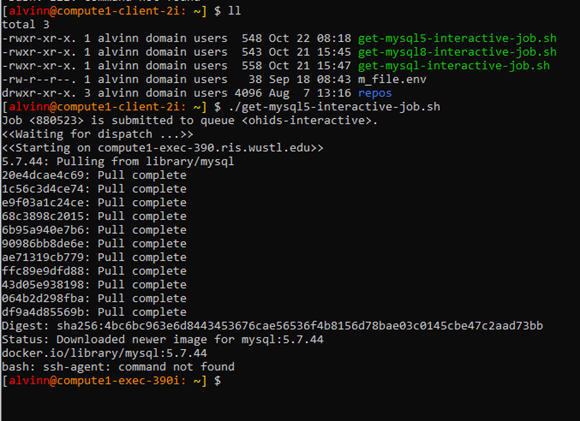
- Log into the RIS Server & run the ./get-mysql5-interactive-job.sh
- This sets the environment needed to login to MySQL
Step 3: Enable logging on Source Database
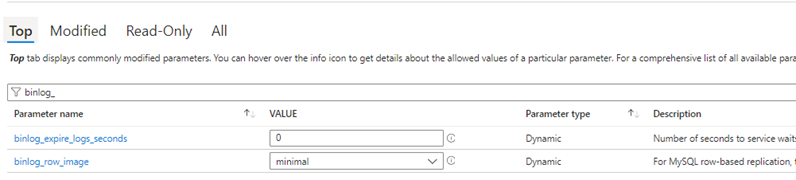
- Change the following settings in order to generate logs on the source DB.
- Set Binlog_expire_logs_seconds = 604800 & binlog_row_image = Full*
- Binlog_expire_logs_seconds sets the expiration date. Note this changes will require a database restart.
Step 4: Prepare production database for replication
-
Use the following script to ensure that only the redcap database is replicated.
-
The script below only filters non redcap databases.
mysql.%,information_schema.%,performance_schema.%,sys.%,customer_service.%
Step 5: Ensure you can log into the Source DB:
-
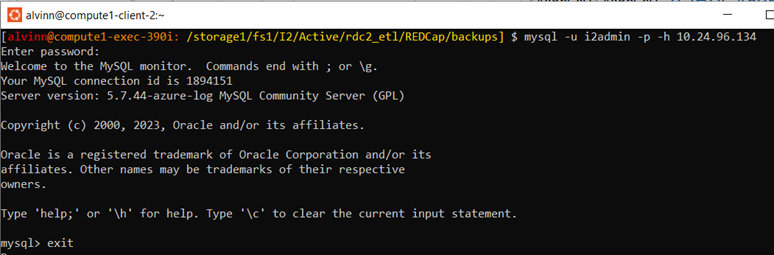
In the RIS, change to the appropriate directory, cd /storage1/fs1/I2/Active/rdc2_etl/REDCap/backups
mysql -u i2admin -p -h 10.24.96.134 -
It will prompt you to enter the DB password.
-
To exit DB, press Exit
-
Screenshot below to confirm DB Access.
Step 6: Perform Database Backup
-
Use the following script to backup the database
time mysqldump -h 10.24.96.134 -u i2admin -p –master-data=2 --single-transaction --quick redcap_appp60m1 > redcap_appp60m1 _prod_replication_10_29_24.sql -
The screenshot below shows how long it took to complete the backup job, which is approximately 739mins or 11.6 hours.

Step 7: Verify Backup files
-
Run the following script to verify that the backup file completed successfully.
-Ensure that the last line of the backup file shows dump completed with a date-stamp.tail -5 redcap_appp60m1_prod_replication_10_29_24.sql

Step 8: Verify master_log_file and master_log_pos
-
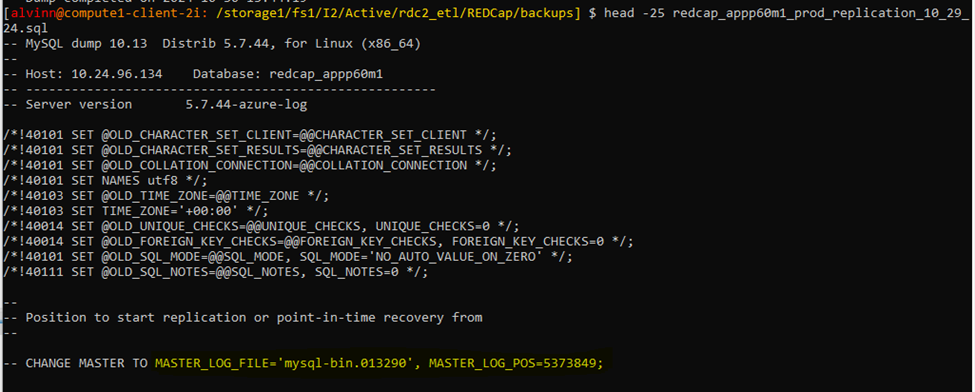
To verify that the both the master log file & master log pos number can be found in the database backup file
head -25 redcap_appp60m1_prod_replication_10_29_24.sql
Step 9: Perform Database Restore
-
To ensure that the backup is successful, make sure that you have the proper database login credentials for the target database.
-
Also, ensure that the compute & storage of both the source & target are identical.
-
Source login credentials:
-
Username: i2adminv8
- Password: i2-redcap-prod-v8-mysql-password
-
Use the following script to do the restore, you will be prompted to enter the password.
time mysql -h 10.24.96.140 -u i2adminv8 -p -D redcap_appp60m1 < redcap_appp60m1_prod_replication_10_29_24.sql

Step 10: Prepare Secondary database for Replication
-
To begin the replication process, you will first need to login into the secondary database.
-
Use the following script to login, it will prompt you enter your password.
mysql -u i2adminv8 -p -h 10.24.96.140 redcap_appp60m1
Step 11: Enable replication:
-
To enable Replication, use the script below:
CALL mysql.az_replication_change_master(' 10.24.96.134', ' i2admin', ' wM6Au@z0EP12ns!!hgDr', 3306, ‘mysql-bin.013290’, 5373849, '');

Step 11: Start Replication:
-
To start replication, please use the following query:
CALL mysql.az_replication_start;

Monitoring Replication:
-
While replication is running, it is very important to monitor replication to ensure that everything is running smoothly.
-
Use the script below to monitor the replication status at any time.
show slave status \G; -
Pay attention to the seconds_Behind_Master parameter.
-
Pay attention to the seconds_Behind_Master parameter, the number of seconds should always be decreasing.

Step 12: Handling replication errors
-
While performing replication, you may encounter some errors
-
Some of the errors are as follows
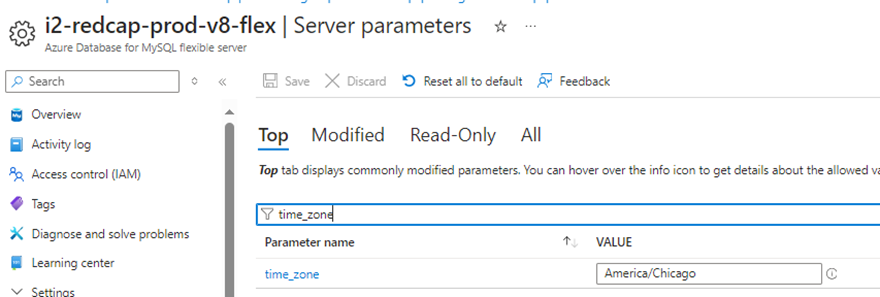
1.  Worker 1 failed executing transaction 'ANONYMOUS' at source log mysql-bin.013290, end_log_pos 5377432; Could not execute Write_rows event on table redcap_appp60m1.redcap_crons_history; Duplicate entry '45901573' for key 'redcap_crons_history.PRIMARY', Error_code: 1062; handler error HA_ERR_FOUND_DUPP_KEY; the event's source log mysql-bin.013290, end_log_pos 5377432
2.  Worker 1 failed executing transaction 'ANONYMOUS' at source log mysql-bin.013290, end_log_pos 5377628; Error 'Unknown or incorrect time zone: 'America/Chicago'' on query. Default database: 'redcap_appp60m1'. Query: 'BEGIN'
Resolutions
-
With the first error, deleting the record stated with resolve the issue, you can use the scrip below to resolve the issue.
DELETE from redcap_appp60m1.redcap_crons_history where ch_id = '45901573'; -
With the second error, this can be resolve by changing the time_zone parameters in the database server parameter on the console.
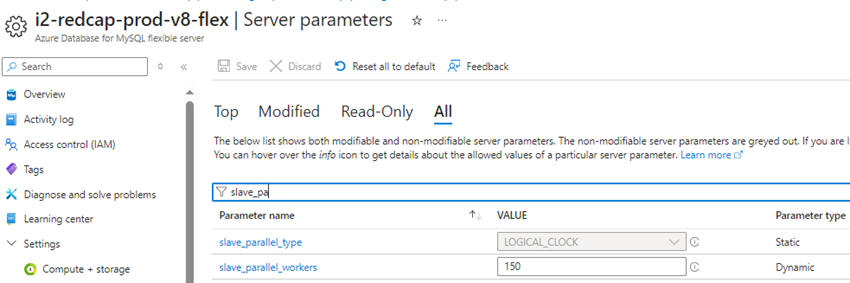
- You may also get an error message referencing the slave_parallel_workers, you may also want to consider increasing the number of parallel workers though the slave_parallel_workers server parameter.
Manually catching up replication
-
There might be scenarios where the primary and secondary database are lagging in replication.
-
In such scenarios, you will need to turn off httpd.
-
However, before tunning off httpd, you you will need to log into the appropriate virtual machine.
-
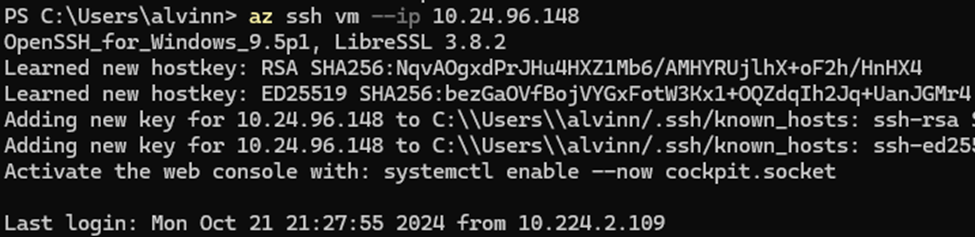
Use the script below to log into the virtual machine:
az ssh vm --ip 10.24.96.148
Step 1: Ensure httpd is running
-
After logging in, you will need ensure httpd is running.
-
Use the script below to verify that httpd is up and running.
sudo systemctl status httpd

Step 2: Stop httpd
-
Stopping httpd will stop the application from sending transactions to the primary database thus allowing the secondary database to process all current lagging transactions.
-
Use the following script to stop httpd:
sudo systemctl stop httpd -
You can also reuse the script to verify that httpd is stopped.
sudo systemctl status httpd
Step 3: Start httpd
-
After stopping httpd and allowing the secondary database to catch up with the primary database, you can use the script below to start httpd again.
sudo systemctl start httpd -
You can also reuse the script to verify that httpd is running.
sudo systemctl status httpd
Step 4: Shutdown VM altogether
-
Sometimes, shutting down httpd may not stop the transaction from occurring, in this scenario, it is best to shutdown the Server entirely.
Sudo shutdown -h now -
Note that once the VM is shut down, it can only be started from the Azure console.