


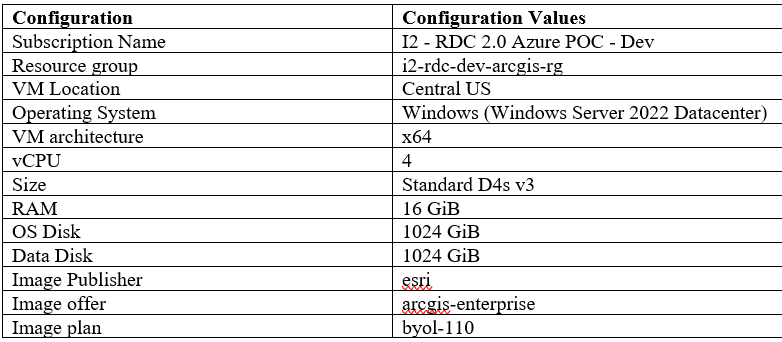
Azure Infrastructure: ArcGIS VM Configuration
ArcGIS was installed on an azure windows virtual machine, the specification to the build the windows Machine are as follow:

ArcGIS Configuration
Once the virtual machine has been deployed, the next thing is to set up all the ArcGIS components. The installation consists of two major components ArcGIS Server and ArcGIS Pro.
ArcGIS Server
To start, setting up ArcGIS server requires setting up the appropriate license. To accomplish this, go to.
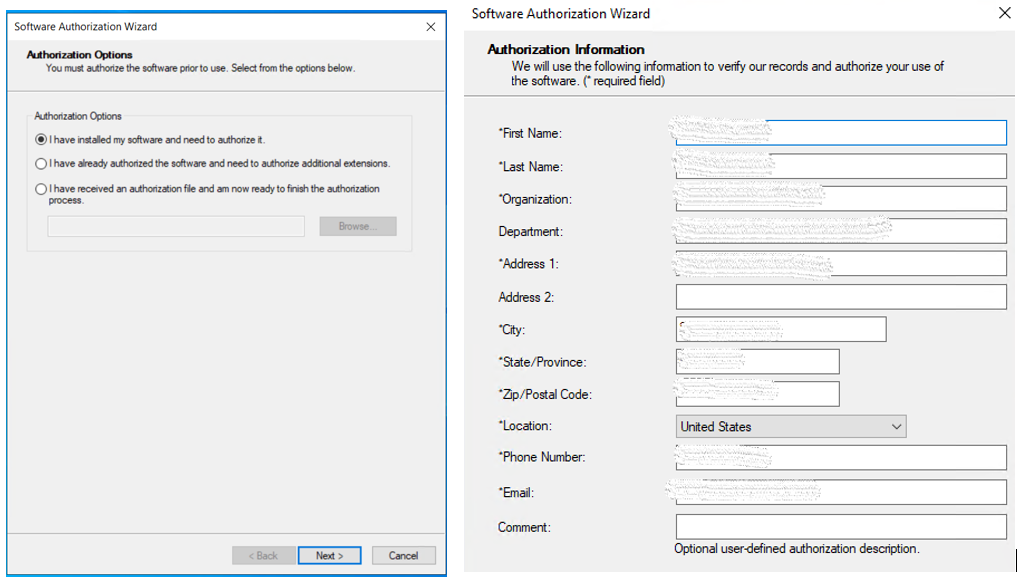
- Start Menu -> click on “Software Authorization for ArcGIS Server”. After clicking a pop up wizard should open.
- In Image 1, select the “Authorize with esri now using the internet” – this will prompt you to login into you my.esri.com.
- Once successfully logged into my.esri.com, the authorization information in Image 2 will be automatically filled.
- Once confirmed that the authorization information matches, you will be prompted to enter ArcGIS Server Authorization number.
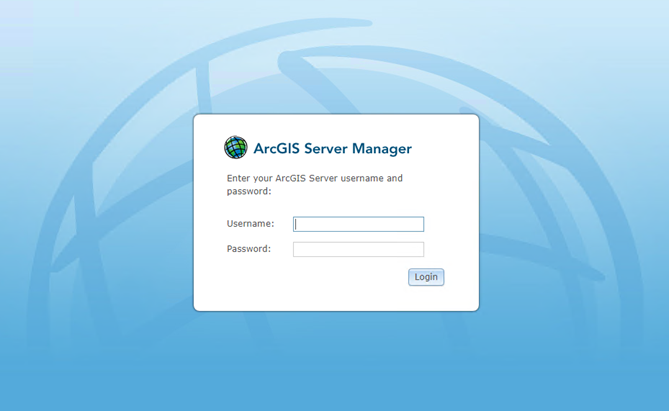
ArcGIS Server Manager
ArcGIS Server Manager allows you to publish and manage your services. The first time you launch ArcGIS Server Manager, a prompt will appear asking if you wish to start a new site or join an already-existing one, see image 3. Creating a site means you will be adding your machine i.e., virtual machine as a new GIS server.
ArcGIS Server Manager Configuration
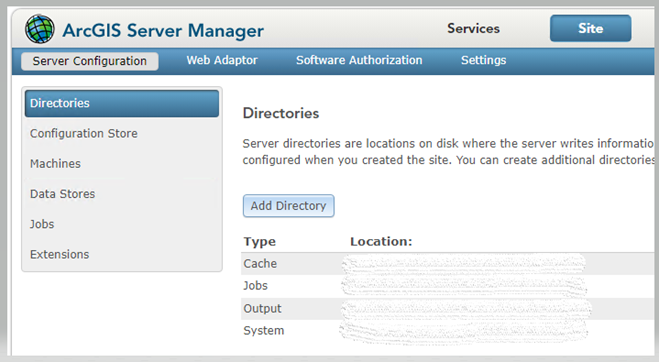
Once you create you are successfully logged into the ArcGIS server, you will need to properly set server directories.
- In the server manager go to Site -> Directories and set the Cache, Jobs, Output, and System directory.
- Additionally, please ensure that the drive that will be used to store the files have enough disk storage.

ArcGIS Pro
ArcGIS pro is the desktop component of ArcGIS that allows you to create and publish map services.
- Prior to launching ArcGIS pro, the Street Maps premium extension will need to be added, to properly added, ensure that the license file has a .licn as file extension.
- Next, go to my.esri.com to download any street map of your preference i.e., North America. Furthermore, ensure that the map file extension ends with .mmpk.
- Next, ArcGIS pro can be downloaded by going to my.esri.com -> Licensing -> ArcGIS Enterprise -> ArcGIS Pro.
- To properly login into ArcGIS pro, you will need to login using you’re “Your ArcGIS organization's URL” -> for wustl, enter wustl in the empty box.

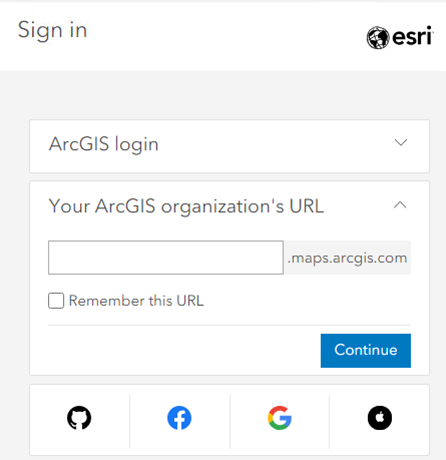
-
Next, after successfully login into ArcGIS Pro you need to start a new project. To create a project, please follow these steps.
- Create a project without a template.
- b. Import map – point it to the Street Maps file you downloaded.
- i. If a new Locator does not appear, Add Locator (it should be in the default directory in the dialog box named ‘Locator’)
- Connect to server. https://
:6443/arcgis/manager - Publish Geolocating Service.