


Azure Databases: Enabling AD MFA in SQL Server
SQL Server has a new feature called MFA that allows user to log into SQL Server using their AD credentials rather than login in as a database user. This allows the user to login with ease without the need to enter their password thus adding an extra layer of security to the database login process.
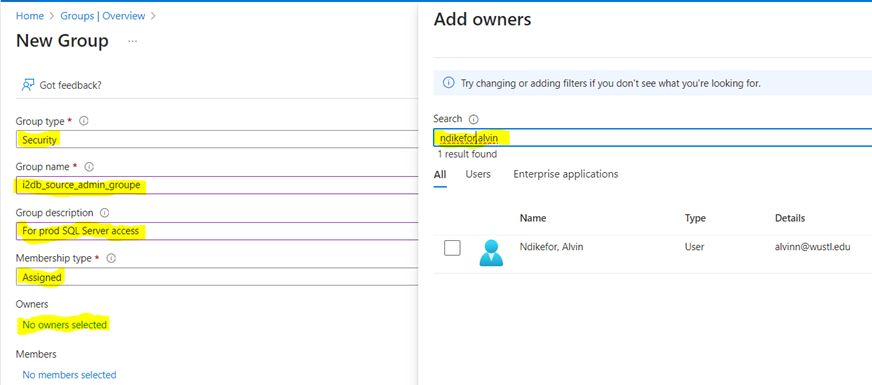
Step 1: Create a group
- To apply the principle of lest privilege, it is always advisable to associate all users to a group, thus allowing them to access the SQL Server instance using a group assigned policy.
- This provides a more comprehensive secure means of accessing the database.
- To create a group, go to Groups > New Group > create Group
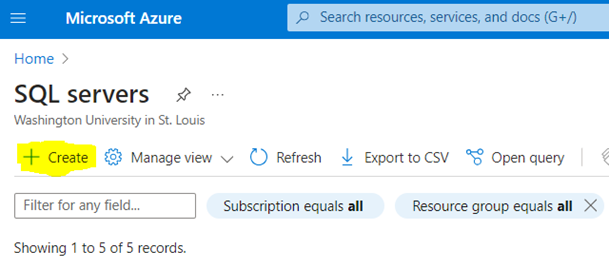
Step 2: Create SQL Server Instance
- Next, proceed to creating a SQL Server instance if one doesn’t already exist.
- To do so go to Azure > SQL Servers > Create.
Step 2: Deploy SQL Server resources
- In the SQL Server creation page, you will need to enter the subscription > Resource Group > Server name & location.
- Next, for Authentication mode: select the Use both SQL and Microsoft Entra Authentication.
- You still need to create an admin login as well.

- After creating and specifying the access, you leave the networking, security and additional settings as default and proceed to review and create.
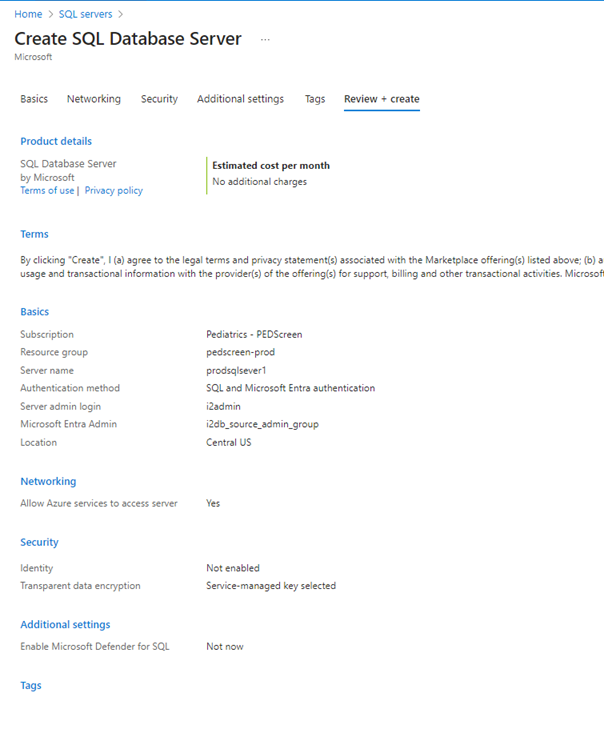
- After creating specifying the access, you leave the networking, security and additional settings as default and proceed to review and create.
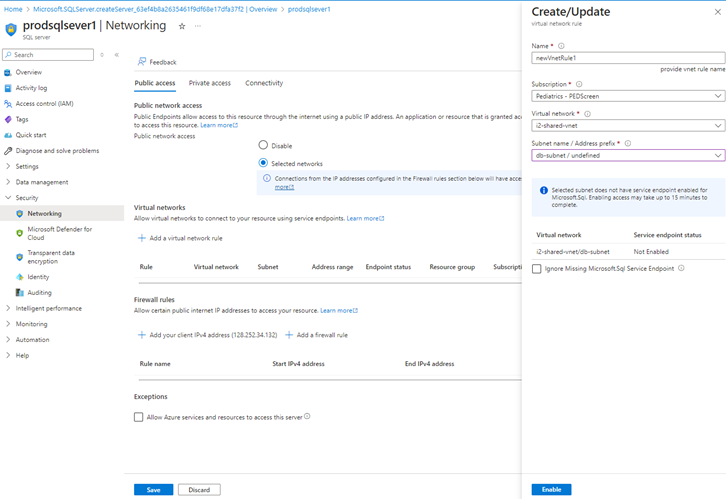
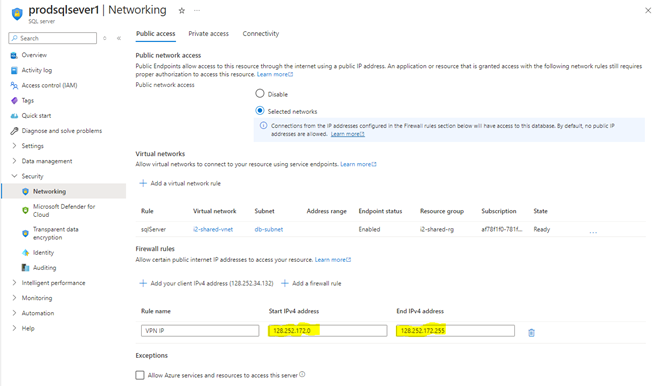
Step 3: Configure SQL Server Instance networking
- After successfully configuring the SQL Server Instance, you must proceed to configuring the network components of the SQL server instance.
- It is essential to limit access to our SQL Server instance
- Go to the SQL Server Instance resource > Security > Networking.
- In Networking > public access > selected networks > Select virtual networks > In the create/Update > you will also have to check enable Microsoft.sql service endpoint.

- You can also restrict network by IP address, you can use the following method to implement network isolation.
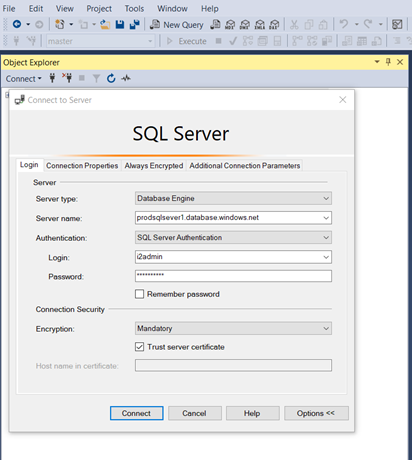
Step 4: Connect as Admin to validate
- In this step, we will need to connect as an admin to validate that the admin account is able to access SQL Server Instance
- To connect the SQL server instance, you can log in using SQL Server management studio or DBeaver.
- For this scenario, I will be using SQL Server Management Studio (SSMS).
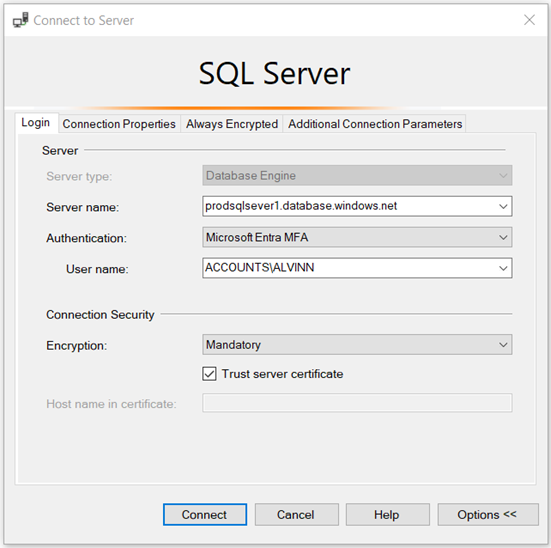
Step 4: Connect using AD EntraID or MFA
- To connect using EntraID, you will need to connect using wustl key.
Step 5: Enabling AD EntraID or MFA on a new database.
- The above validation ensures that we can access the SQL server instance and can access the system databases.
- However, users and groups are not automatically granted access to user created databases.
- Users and groups will have to manually added to that new user database after creation.
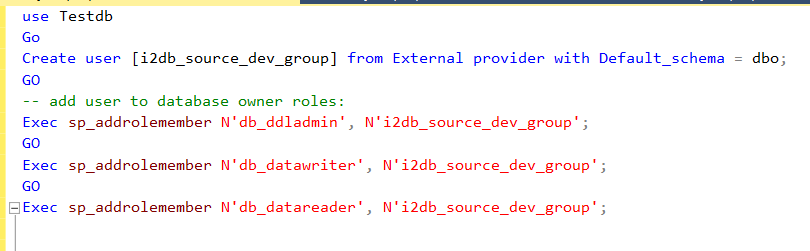
- In the screenshot below, we are adding the i2db_source_dev_group as a user to the Testdb database.
- Additionally, I am also granting the users in the group: Data definition, data writer and data reader permissions
-
Use the scripts below to add the user and permissions to the database.
- use [databasename]
- Go
- Create user [user/groupname] from External provider with Default_schema = dbo;
- GO
- -- This Scripts add user to database roles/permissions:
- Exec sp_addrolemember N'db_ddladmin', N'user/groupname';
- GO
- Exec sp_addrolemember N'db_datawriter', N'user/groupname';
- GO
- Exec sp_addrolemember N'db_datareader', N'user/groupname';