AWS Infrastructure: Assessing EBS volume Data
The document details the step I used to retrieve the Care tool application code that is currently hosted on an EC2 instance in AWS. The developer who built the EC2 instance tool had left their position and thus the team is facing difficulties accessing the application code due to the missing private key that is needed to access the EC2 instance.
The application code will be moved from the newly created EC2 instance and stored in S3 bucket called caretool-code.
To retrieve the application code, there are several steps that will be used to achieve this. These steps are as follows:
- Create an Admin user.
- Take a snapshot(backup) the current EC2 instance EBS volume
- Create a new EBS volume from the EBS volume snapshot
- Create an a new EC2 Instance
- Attach the EBS volume to the EC2 Instance.
- Mount the EBS volume to the new EC2 Instance.
- Perform directory mapping exercise.
- Move application files to an S3 bucket called caretool-code.
Set up administrative user:
- The only AWS account user available for this project was the root account user.
- To mitigate the root account user credentials from getting exposed, we created an Admin user.
- This admin user has same function as the root account user; however, they cannot access the AWS account billing.
- Additionally, this user can be used to carry out administrative task on the AWS account such as creating other less privileged users.
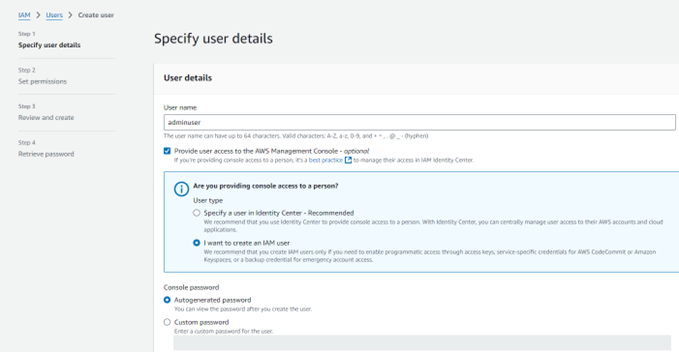
- To create an and admin User use the following steps:
Go to IAM Service
- In the AWS console, search for the **IAM service **
- Select Users
- Select Create Users
- Enter username -> choose Provide user access to the AWS manegement Console – Optional
- Enter Console Password
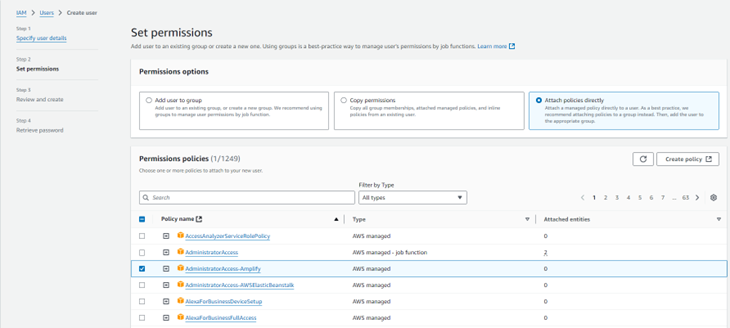
- Set the user permissions:
- In the set permissions, select the user permission as needed.
Log into Aws account
- After creating the IAM user, you should log back in with the IAM user.
- On the log in page, you will be prompted to enter the AWS account ID, IAM (username) and password:

Backup EBS volume Snapshot:
- In AWS, EBS volumes are similar to Azure managed disk.
- To ensure that we can access the application code, we will need to take a backup of the EBS volume that is attached to the EC2 instance that the application is running on.
- Use the steps below to achieve this:
Step 1: Go to EC2 service:
- Go tot the search bar in AWS and type “EC2” and select the first option.
Step 2: Take Snapshot of EBS volume:
- If you are not aware of the EBS volume you need to backup, you can go to the running EC2 instance and verify the volume ID of EBS volume attached to the running EC2 instance.
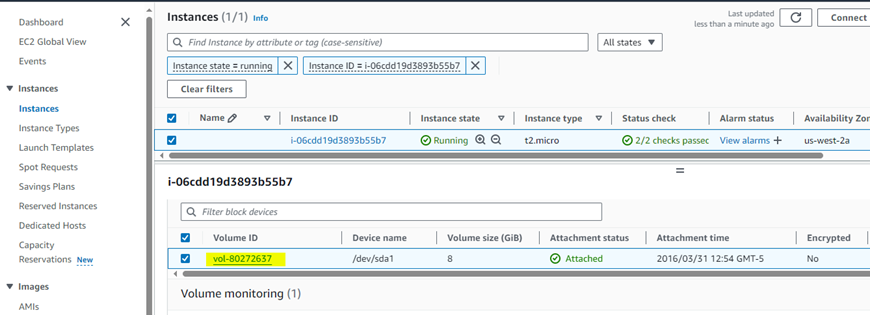
- After getting the volume ID, navigate to the EBS volume page and perform snapshot.
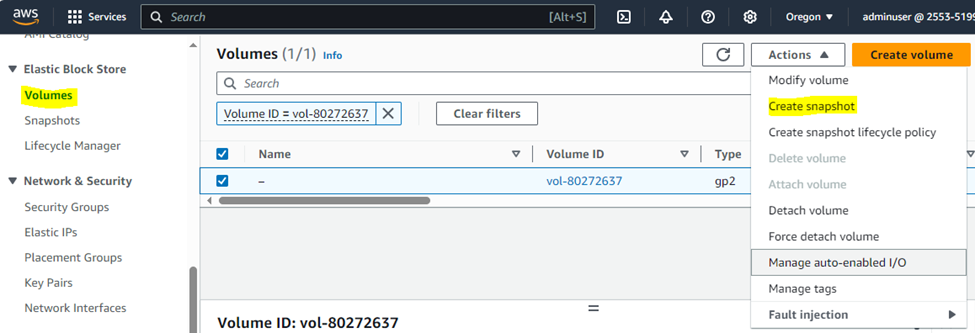
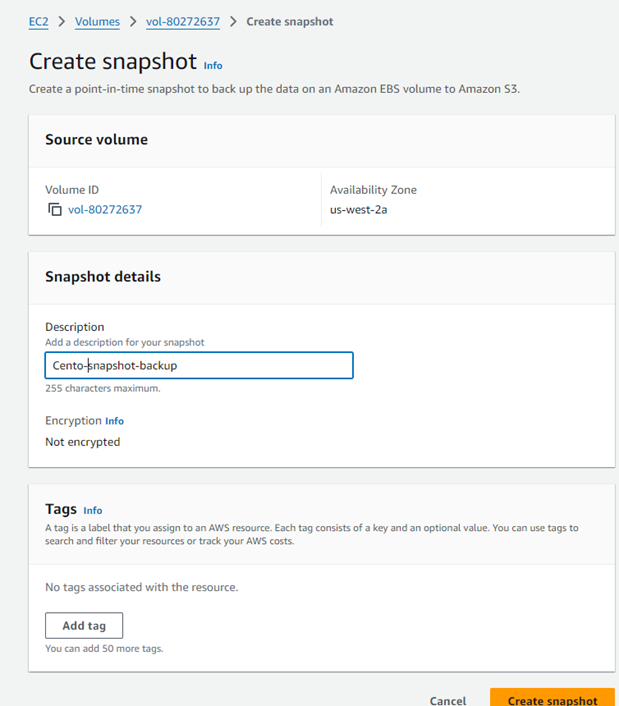
- A create snapshot page will pop up, enter the necessary details:
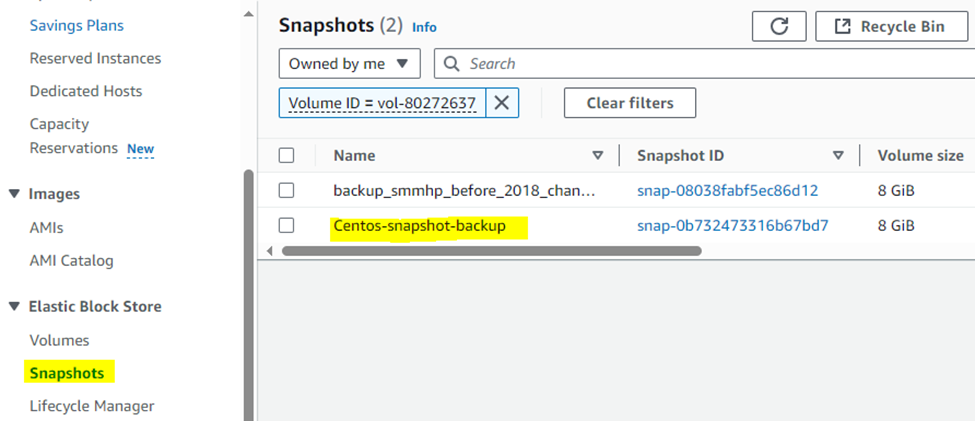
- Next verify the snapshot has ben create, navigate to the snapshot tab and check for snapshot.
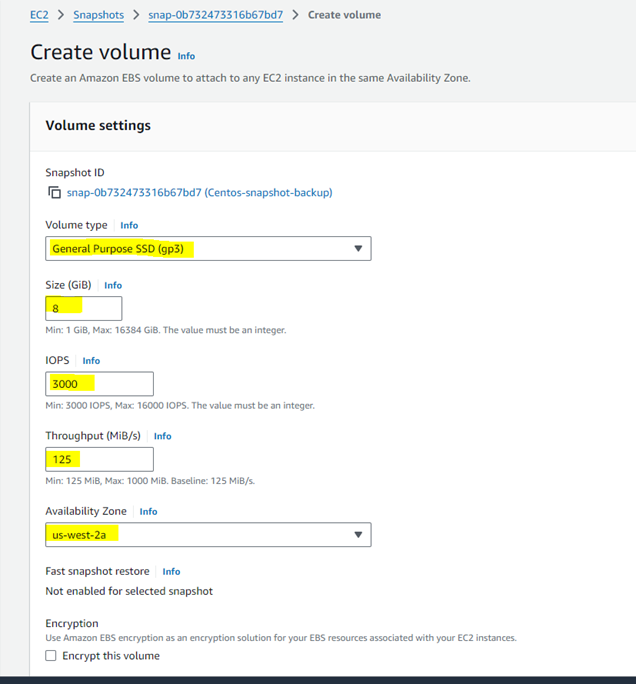
Step 3: Create a new EBS volume from the Snapshot
- After creating the snapshot for your EBS volume, select the snapshot and click on the Actions tab and select Create Volume from Snapshot.
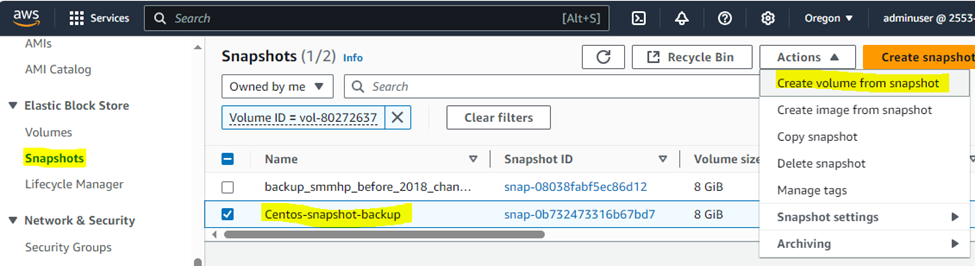
- In the create window, ensure you are creating the volume in the same availability zone that the EC2 instance will be deployed in, for this instance, I am creating it in the us-west-2a availability zone.
- Ensure that volume type is general Purpose SSD (gp3), choose the size & IOPS.
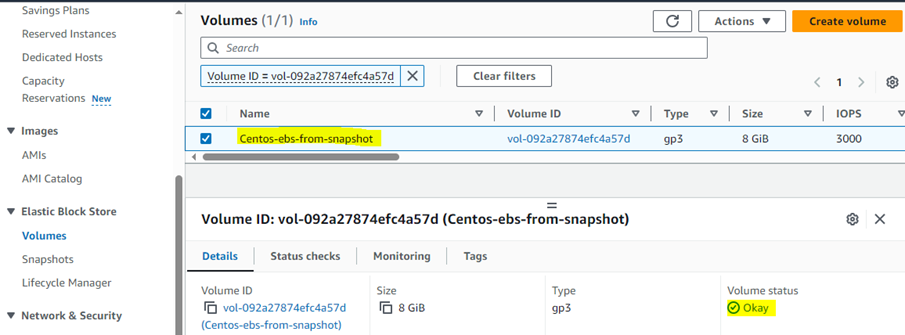
- Verify the EBS volume is up and running, when validated the volume status should be “Okay.”
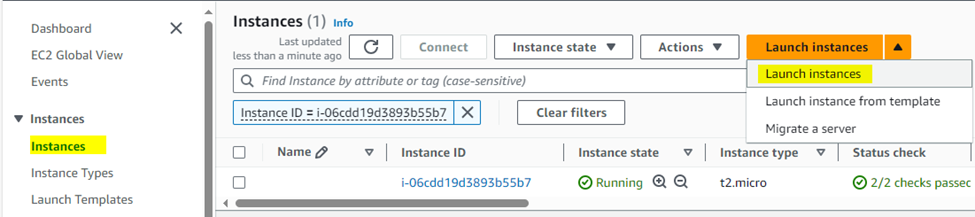
Create EC2 Instance
- After ensuring the EBS volume is done, we can then proceed to creating an EC2 instance.
- To do so, go to Instance Tab in the EC2 service then click on launch Instance.
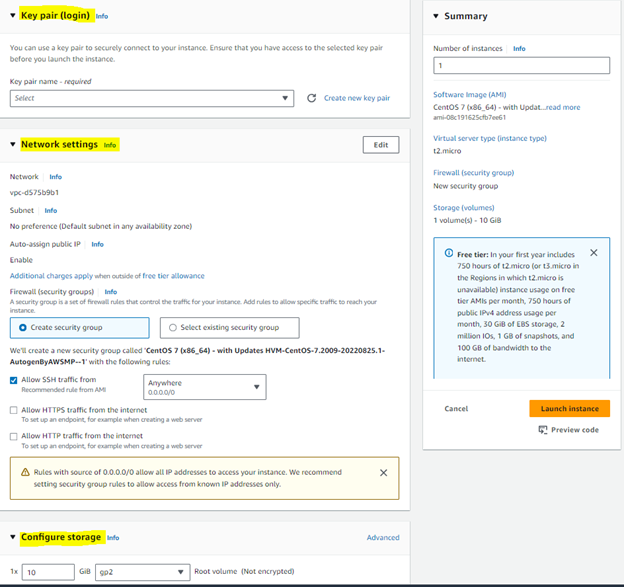
- In the create page, you will need to enter the instance name then select an application or O.S image.
- However, there might be an application or an O.S that is not available as an offering, in such scenario, you will need to acquire the O.S from the amazon marketplace.
- To build this EC2 instance, I used an O.S from amazon marketplace called CentOS Linux 7 x86_64 HVM EBS.
- I select this O.S to mimic the source EC2 instance that is also using same O.S.
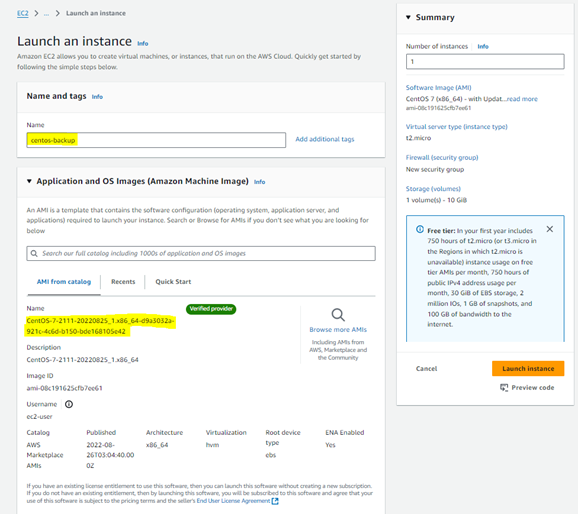
- Next, set up the key pair for login, network settings and storage as needed. Then created the VM
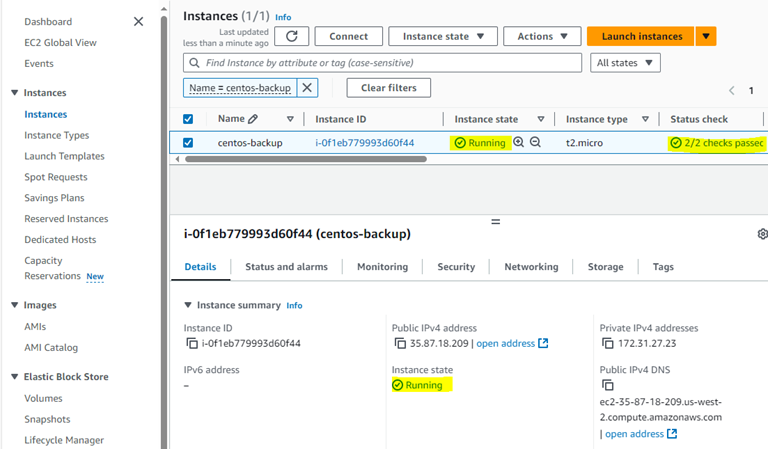
- Next ensure the EC2 instance is up and running.
- When the instance has been deployed successfully, instance state = Running, status check = 2/2 checks passed.
Attach EBS volume to EC2 Instance:
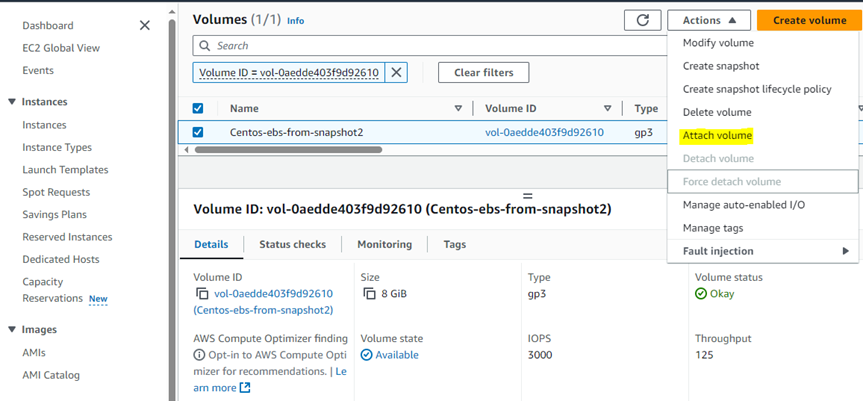
- To attach an EBS volume to an EC2 instance, go to the volumes tab and select the volume, ensure that the volume state is Available, and volume status is okay.
- Then select the EBS volume and select attach volume option.
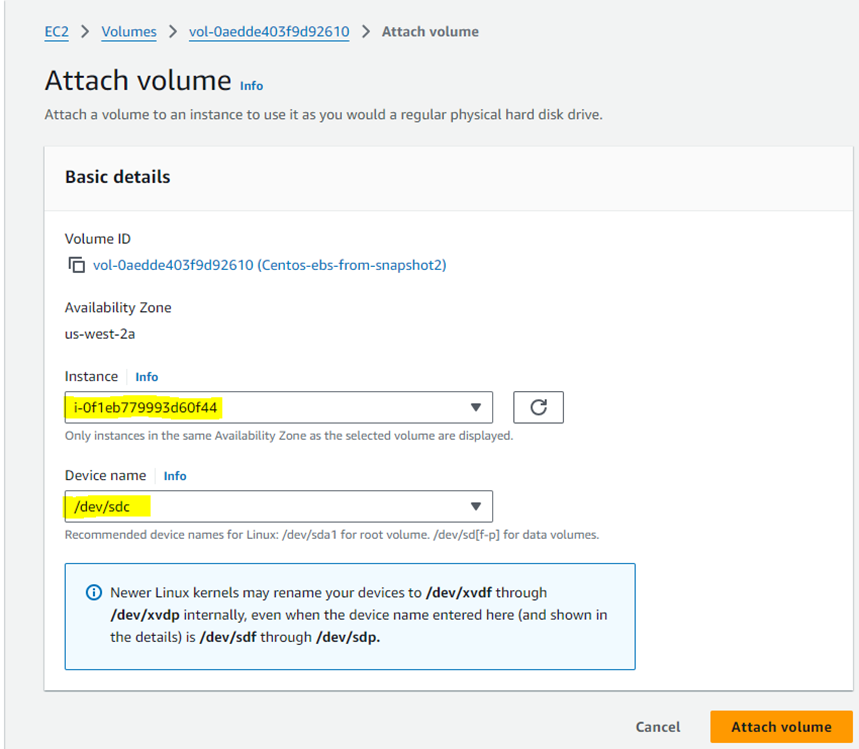
- In the attach EBS volume tab, you will be prompted to select the instance and device name, the device name is basically the mount point of the EBS volume on the EC2 instance.
- Please note that your EC2 instance needs to be in the stopped state before you attach the EBS volume.
- Next, to verify the EBS volume has been attached, go to your EC2 instance then select storage and you will a secondary EBS volume.

Log into the EC2 instance:
-
To log into this EC2 instance, you will need to have th private key pair on your P.C
-
The default username for Linux EC2 user in AWS is ec2-user, however, since I created the EC2 instance using Centos O.S, the username will be “centos”
-
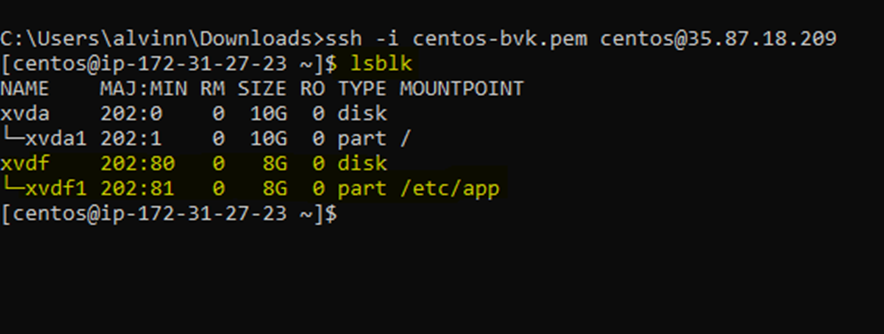
The following command lets you access the VM:
ssh -I privatekeyname vmUser@ipor hostname.

ssh -i centos-bvk.pem centos@35.87.18.209

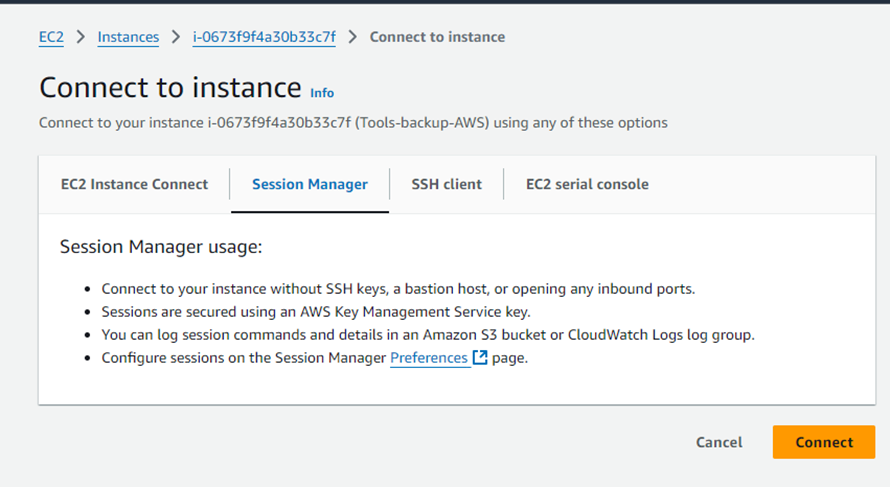
- Additionally, you can also use the session manager to connect to the EC2 instance.
Mount EBS volume to EC2 instance
-
The following command you see all the EBS volumes attached to the EC2 instance.
lsblk
-
The highlighted volume that starts with Xvdf is the EBS volume that was attached the EC2 Instance.
-
To mount the EBS volume, you will need to create a directory first, then mount the attached EBS volume to that directory, the following script will achieve this:
	Sudo mkdir /etc/app – This script creates the directory.
    Sudo mount /dev/xvdf1 /etc/app - This script mounts the EBS volume to /etc/app
Map the application code directories to the new EC2:
- This portion of the document is dedicated to finding the source application code in the new EC2 instance.
- Even though the source EBS volume was attached to this VM, we need to make sure that we can locate the codes in the VM.
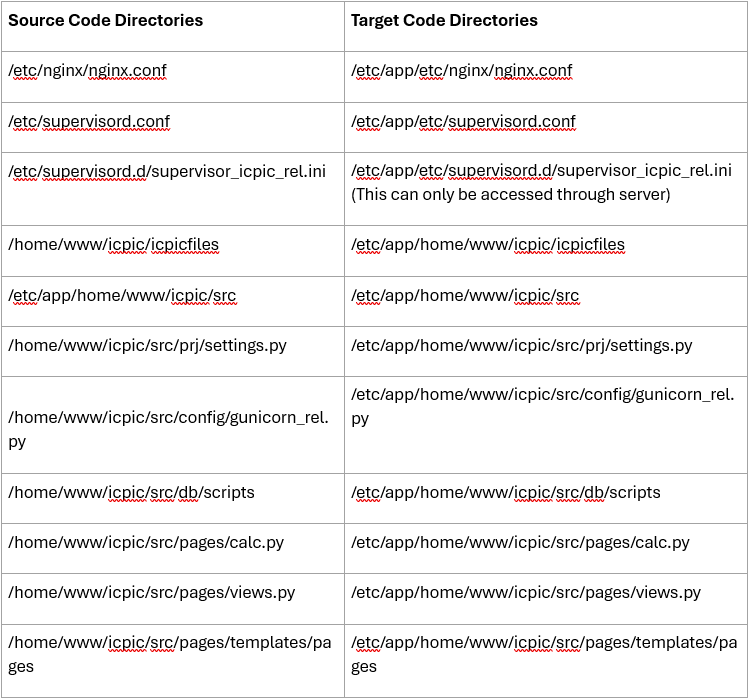
Important Source code directories:
- Nginx
- /etc/nginx/nginx.conf
- Supervisor
- /etc/supervisord.conf
- /etc/supervisord.d/supervisor_icpic_rel.ini
- Django
- /home/www/icpic/icpicfiles
- /home/www/icpic/src
- django configuration
- /home/www/icpic/src/prj/settings.py
- gunicorn config
- /home/www/icpic/src/config/gunicorn_rel.py
- mysql/mariadb database scripts
- /home/www/icpic/src/db/scripts
- Calculation
- /home/www/icpic/src/pages/calc.py - this file has most of it
- /home/www/icpic/src/pages/views.py - this is more display
- html files - for text and images
- /home/www/icpic/src/pages/templates/pages
- Notes from previous developer:
- To get the tool working from the new instance at the very least you'll have to update ALLOWED_HOSTS in settings.py and server_name(s) in nginx.conf
- The Following table shows what directory the application codes are stored on the new EC2 Server: