


Azure Databases: How To Replicate MySQL flex Servers
This document details out the step-by-step process required to set up replication between multiple MySQL Flex servers. Replication is essential when we want to switch databases without having Zero Downtime between the application & database. It is also highly recommended to use replication as a solution if we want to implement high availability or have a robust disaster recovery solution.
Prerequisites:
- Source/Primary and Secondary/Target Servers
- Source/Primary = redcap-qa-mysql-flex
- Secondary/Target = redcap-qa-replication
- Appropriate MySQL utility
- Admin or user with appropriate permissions
Replication steps:
Step 1: Set up Database & Environment
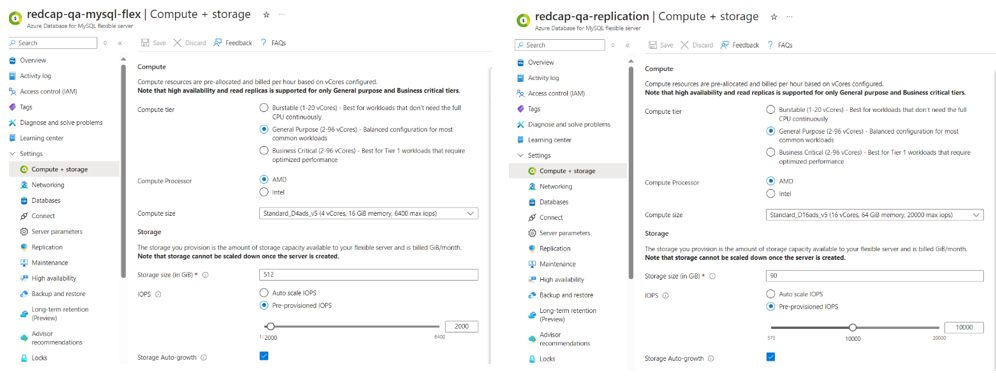
- Ensure that both the source & target servers have the same compute and storage metrics, failing to do so will result in issues.
- It is also advisable that the target (redcap-qa-replication) database server has more compute & storage than the source(redcap-qa-mysql-flex).
- Before beginning the replication, we need to set up the environment properly, in this example, I am setting up the environment within the RIS server.
- First, you will have to login into the RIS server. After login in, setting up the environment involves running the appropriate MySQL interactive job.
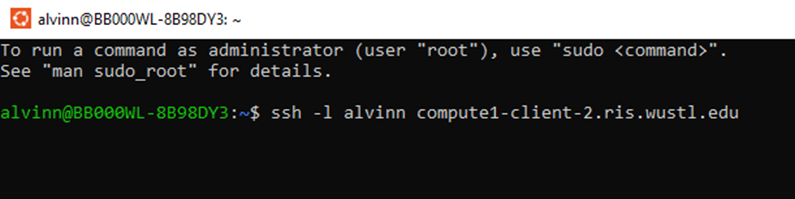
Login into RIS Server
- You will also be prompted to enter your password
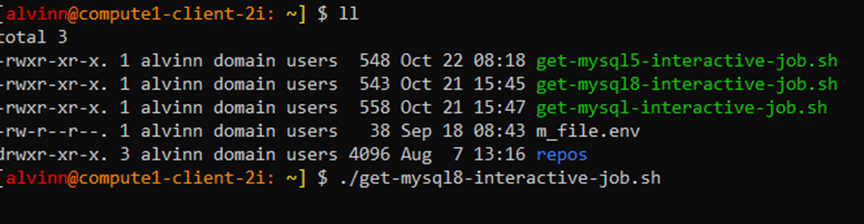
Executing MySQL Interactive job
- There are three interactive jobs i.e., get-mysql5-interactive-job.sh, get-mysql8-interactive-job.sh, get-mysql-interactive-job.sh
- If the MySQL version is v8 then run the get-mysql8-interactive-job.sh and vise versa.
Step 2: Backup Source Database
-
Before backing up source database, if you are on the RIS server, ensure you are in the /storage1/fs1/I2/Active/rdc2_etl/REDCap/backups/ directory.
-
Once in the directory, use the following script to back up the Source database.
time mysqldump -h <Source Host name or IP> -u <Source Username> -p --source-data=2 --single-transaction --quick <Source Databasename> > -
This is what the script should look like with the appropriate source database values.
time mysqldump -h 10.24.96.139 -u i2adminv8qa -p --source-data=2 --single-transaction --quick redcap_appq32m1 > redcap_appq32m1_replication_10_24_24.sql -
Once you run the query it will prompt you to enter the Password.
Step 3: Retrieve master log file & master log position number
-
Once the backup is completed, you will need to retrieve two crucial values from the backup file that will be needed to implement the replication.
-
Both the master log file & master log position number are found on the last 25 lines of the backup file.
-
Use the following script to get the information.
head -25 redcap_appq32m1_replication_10_24_24.sql -
The script output will the following:
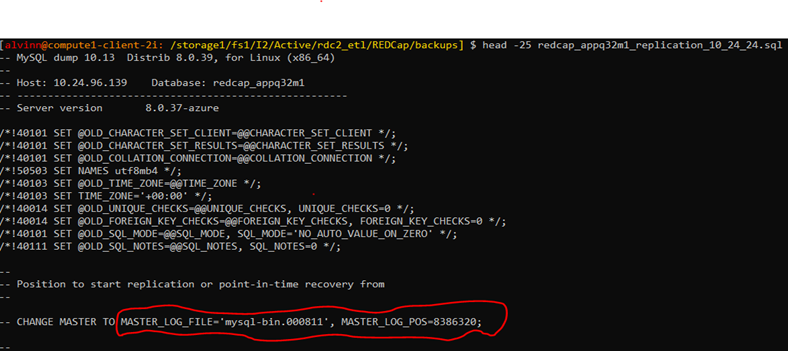
Log File & Master Log number
(enlarged image)
Step 4: Restore Database
-
On the MySQL Target database server, run the following restore script to restore the Database:
time mysql -h <Target Host name or IP> -u <Target Username> -p -D <Target Databasename> > <backupfilename>.sql -
This is what the script should look like with the appropriate target database values.
time mysql -h 10.24.96.142 -u i2adminv8qa -p -D redcap_appq32m1 < redcap_appq32m1_replication_10_24_24.sql -
Once you run the query it will prompt you to enter the Password.
Step 5: Granting appropriate user permissions
-
If you do not have access to the admin user for the source database, you can optionally create a user & grant them the appropriate permission as needed.
-
Use the following script to achieve this:
  CREATE USER 'sync_user'@'%' IDENTIFIED BY '<redacted>';
  GRANT REPLICATION SLAVE ON *.* TO ' sync_user'@'%';
Step 6: Set filters on the source database
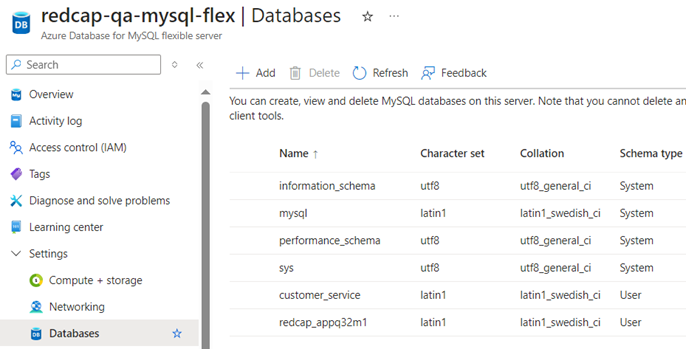
- This step is needed to filter out the databases that we do not want to replicate, if this is not applied then all the databases will be replicated, included system databases.
- As shown below, there are a total of 6 databases in the source database server, but we only want to replicate the redcap_appq32m1.
-
To apply the filter, go to the source database in Azure then go to Server Parameters -> All -> replicate_wild_ignore_table parameter.
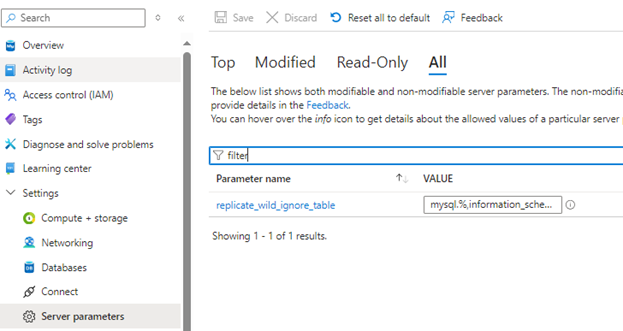
(enlarged image)
-
In the filter menu, apply or modify the following script as needed & apply it.
mysql.%,information_schema.%,performance_schema.%,sys.%,customer_service.% -
After applying the changes, click on Save.
Step 7: Configure Replication on the target database
-
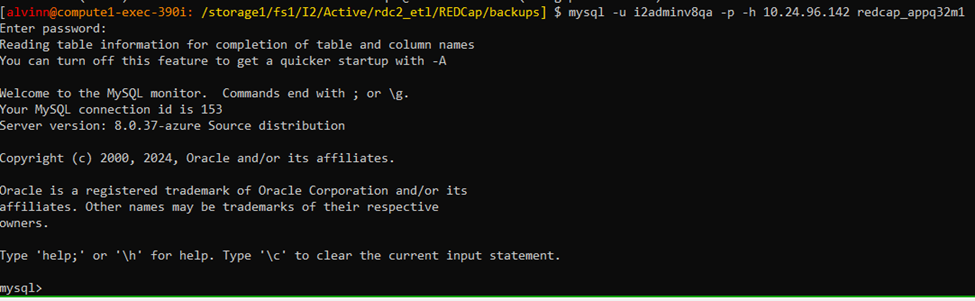
To begin replication, you will need to login into the target database server.
-
If using the RIS server, use the following script to login into the appropriate database server.
mysql -u <target username> -p -h <Target hostname or IP> <target Database Name> mysql -u i2adminv8 -p -h 10.24.96.142 redcap_appq32m1 -
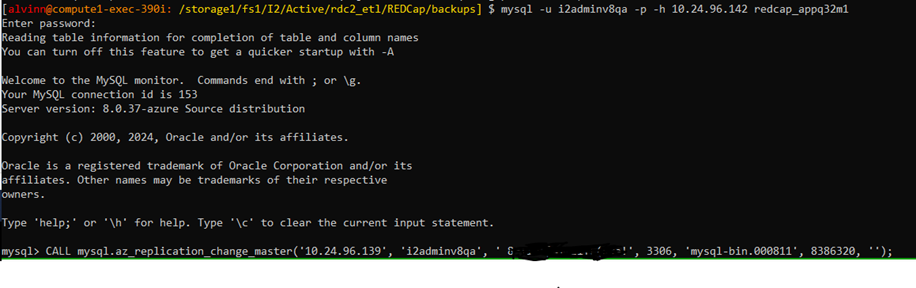
Next, start the replication process by calling the replication process with the following script:
CALL mysql.az_replication_change_master('<Source Hostname or IP>', '<Source username>', '<Source usename Password>', '<master log file>', '<binary log number>', ''); -
Note that the Master log file & Binary log file are in step 3 of this documentation.
-
This is what the script should look like with the appropriate source database values.
CALL mysql.az_replication_change_master('10.24.96.139', 'i2adminv8qa', ' xxxxxxxxxx', 3306, 'mysql-bin.000811', 8386320, ''); -
After executing the call replication script, you will need to start the replication.
-
Use the following script to start the replication.
CALL mysql.az_replication_start; -
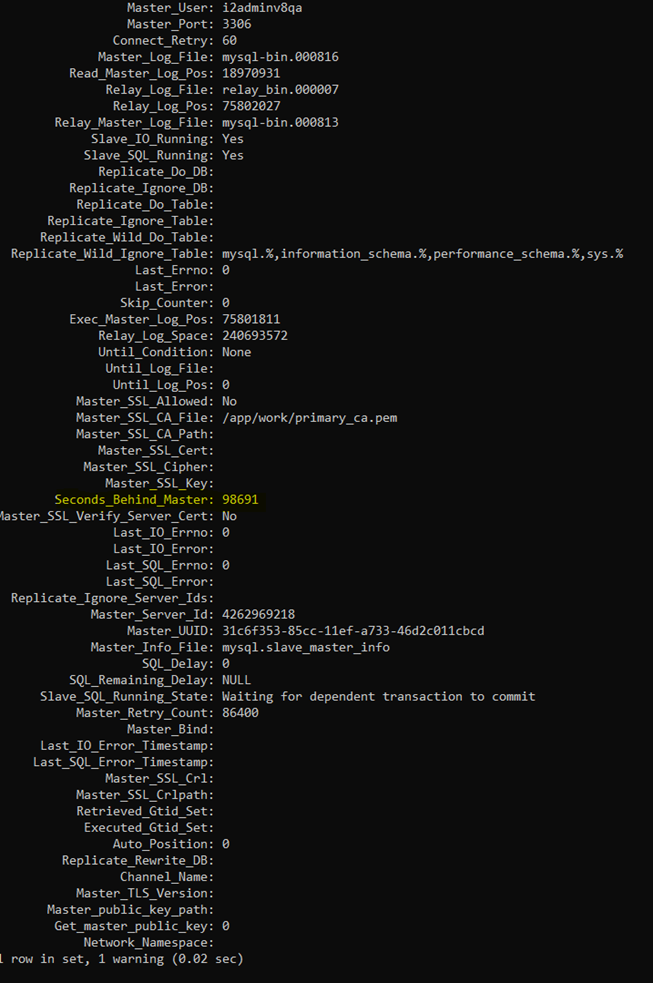
Next, use the following script to view the progress of the replication.
show slave status \G -
When viewing the progress of the replication, the value of the Seconds_behind_Master parameter should reduce each time you rerun the show slave status.
-
This value lets us know how far behind the replication/target database is from the primary/source database.
-
The goal is for Seconds_behind_Master to have a value of zero.
Output of the show slave status script:
- Seconds_behind_Master parameter is highlighted in yellow:
Seconds_Behind_Master with a value of zero:
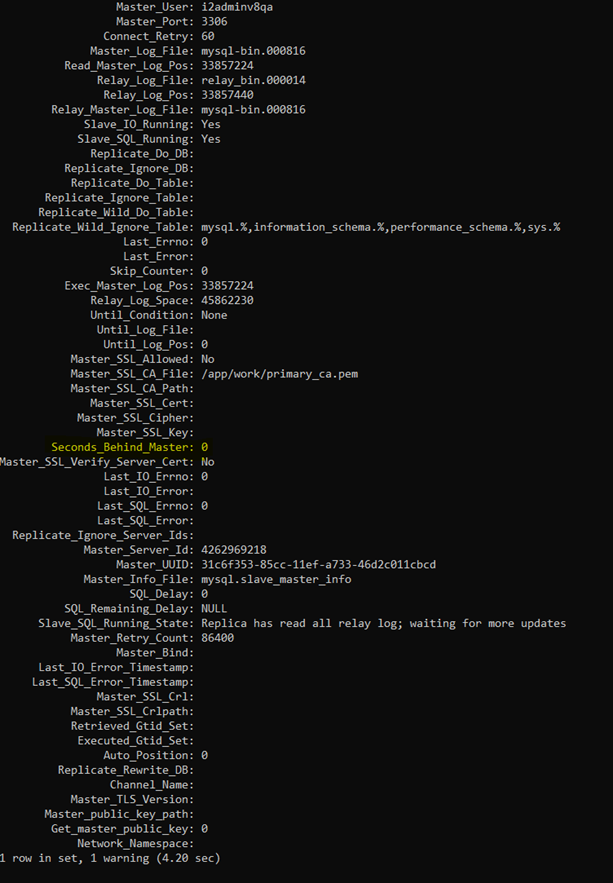
(enlarged image)