Azure Databases: Setting up .bash & .pgpass files in RIS server & commands to naviagate:
Most the steps outlined in this document are reference in the ris-etl-deployments repo.
The steps to set up the user's home environment i.e., bash_profile file are outlined in step 5 of the document.
Step 1: Log into the ris server.
ssh -l alvinn compute1-client-2.ris.wustl.edu Step 2: Set up bash_profile & .pgpass profile:
If you do not have a bash file already set up, you can use the following commands to create the .pgpass file & bash_profil:
    touch ~/.ssh/.pgpass

    chmod 600 ~/.ssh/.pgpass

    # copy pgpass template info
    echo "# host:port:database:username:password" >> ~/.ssh/.pgpass

    # This creates the bash_profile
    cat bash_profile >> ~/.bash_profile
Step 3: Set up bashrc file.
If you cureentyl have an existing bashrc file, ensure that all of its content is similar to that ris-etl-deployments-bashrc repo.
The deleted content of the bashrc file should look like this.
Bashrc pre-edit
(enlarged image)
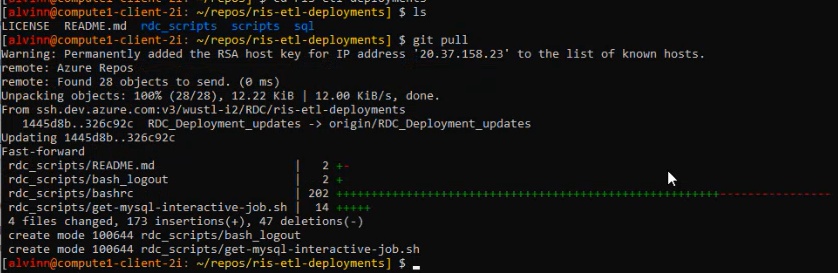
On the ris server, run the following commands:
## Change directory
cd /repos/ris-etl-deployments/rdc_scripts

# ensure the pull is done in the **RDC_Deployment_updates** branch and not main branch
git branch

# if not in right branch run the following command checkout branch
git checkout RDC_Deployment_updates

## do a git pull
git pull
Updating bashrc file
(enlarged image)
Step 5: append the Bashrc file
In the step, we will append te bashrc file from the repo to our local bashrc file.
Run the following commands to achieve this:
# verify all files in home directory
ls -al

# go the rdc_scripts
cd /repos/ris-etl-deployments/rdc_scripts

# view content of bashrc file
# to exit the cat view, press q key.
cat bashrc

# to append bashrc from repo to local bashrc
cat bashrc >> ~/.bashrc

# view content of new bashrc file
less ~/.bashrc
bashrc content
(enlarged image)
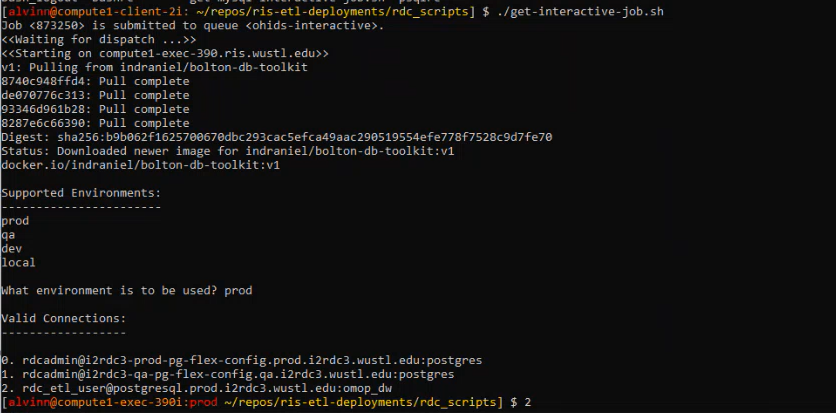
Step 7: Validate everything works:
Run the LSAB job to validate:
LSAB job validation
(enlarged image)
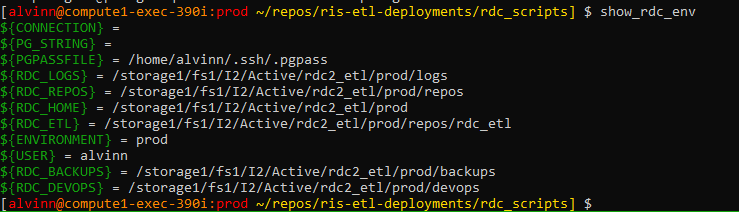
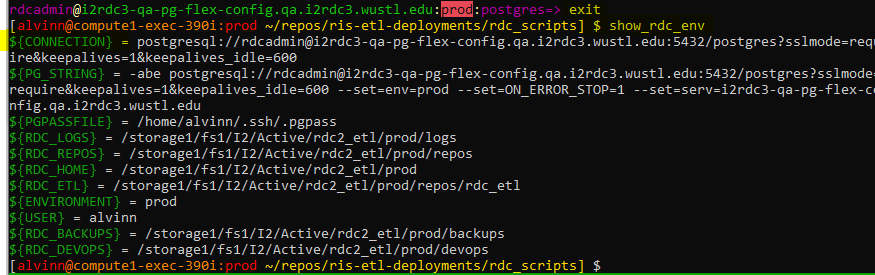
Step 8: verify environment variables:
After selecting the environment, the following command allows you to see the environment variables:
# allows you to view all environment variables after defining your environment
show_rdc_env
Validate environment variables
(enlarged image)
Note that each variable points to a specific directory in the repo.
Additionally, note that the {CONNECTION} &
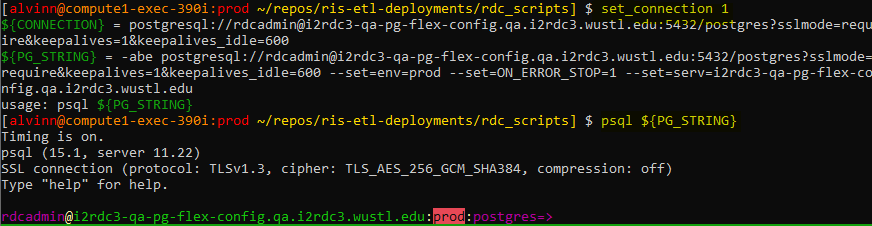
# this script allows you to set the connection using the valid connection table list
set_connect 1

## connect to database:
psql ${PG_STRING}
Database connection
(enlarged image)
If you exit the database and rerun the show_rdc_env , both of the {CONNECTION} & will be populated.
{CONNECTION} &
{PG_STRING}
(enlarged image)
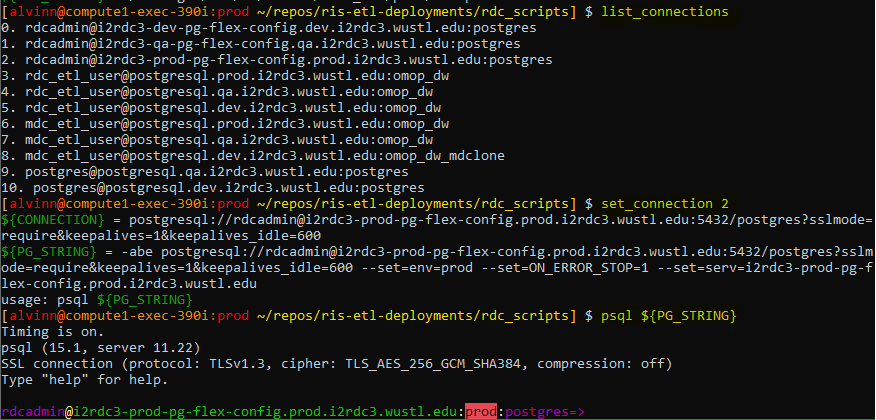
To change to a different database server, run the following command:
# see all databse conections again:
list_connections

# select connection
set_connect 2

## connect to database:
psql ${PG_STRING}
change database connection
(enlarged image)