


How to Create a Databasin Pipeline
This guide provides step-by-step instructions to create pipelines in Databasin. You will learn how to add and configure a new pipeline to automate the ingestion various data sources.
Prerequisites
- You should have an active account on databasin.wustl.edu.
- Basic understanding of database connections and parameters.
Steps
- Login to Databasin
- Navigate to databasin.wustl.edu and log in with your credentials.
- Select a Project
- Once logged in, select the project where you want to manage connectors.
- Navigate to the Pipelines Page
- In your project, go to the
Pipelinespage.
- In your project, go to the
- Create a New Pipeline
- Click the
Create New Piplinebutton.

- Click the
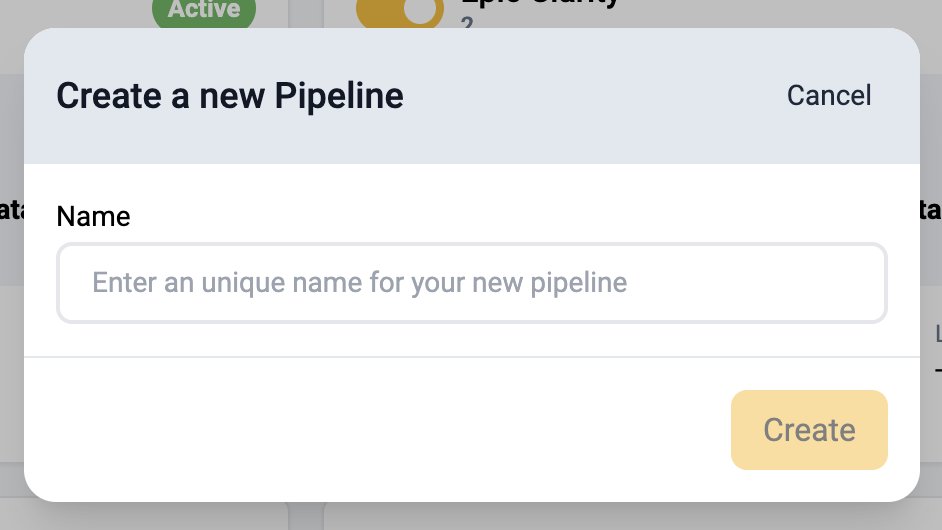
- Name the Pipeline
- Enter the name of the pipeline in the dialog box.
- Click the
Createbutton.
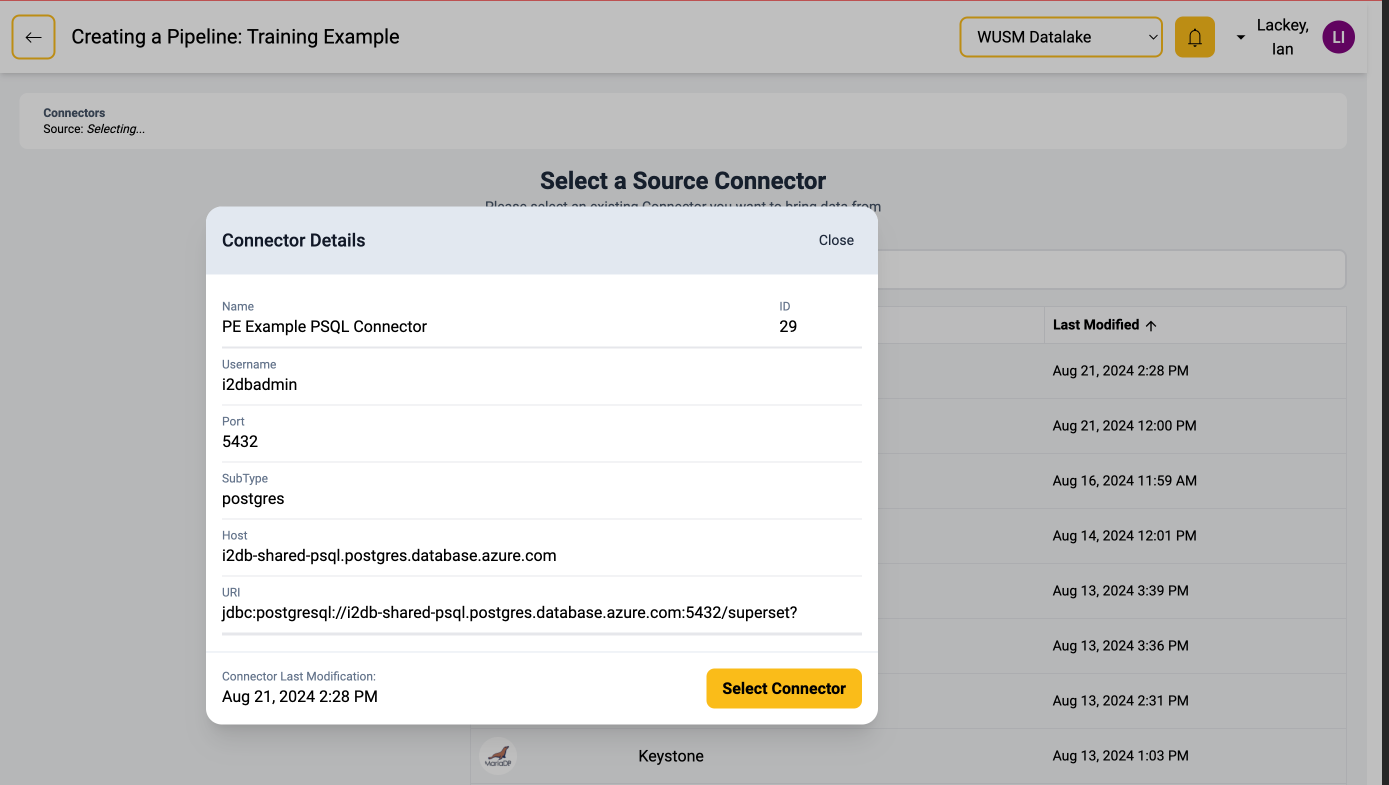
- Source Connector
- Find the source connector you would like to use for the pipeline.
- Click on the row with the appropriate connector.
- Click the
Select Connectorbutton.
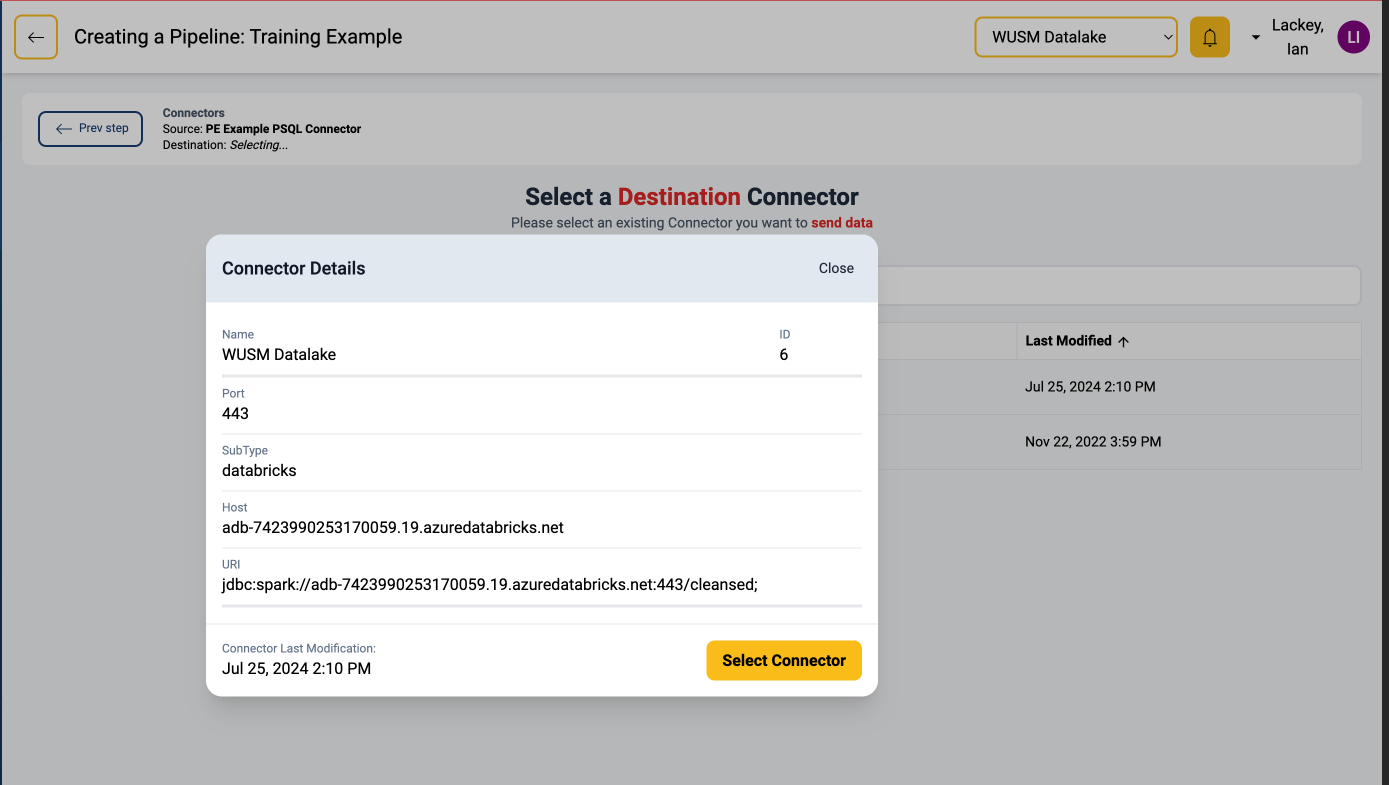
- Destination Connector
- Find the destination connector you would like to use for the pipeline.
- Click the row with the appropriate connector.
- Click the
Select Connectorbutton.
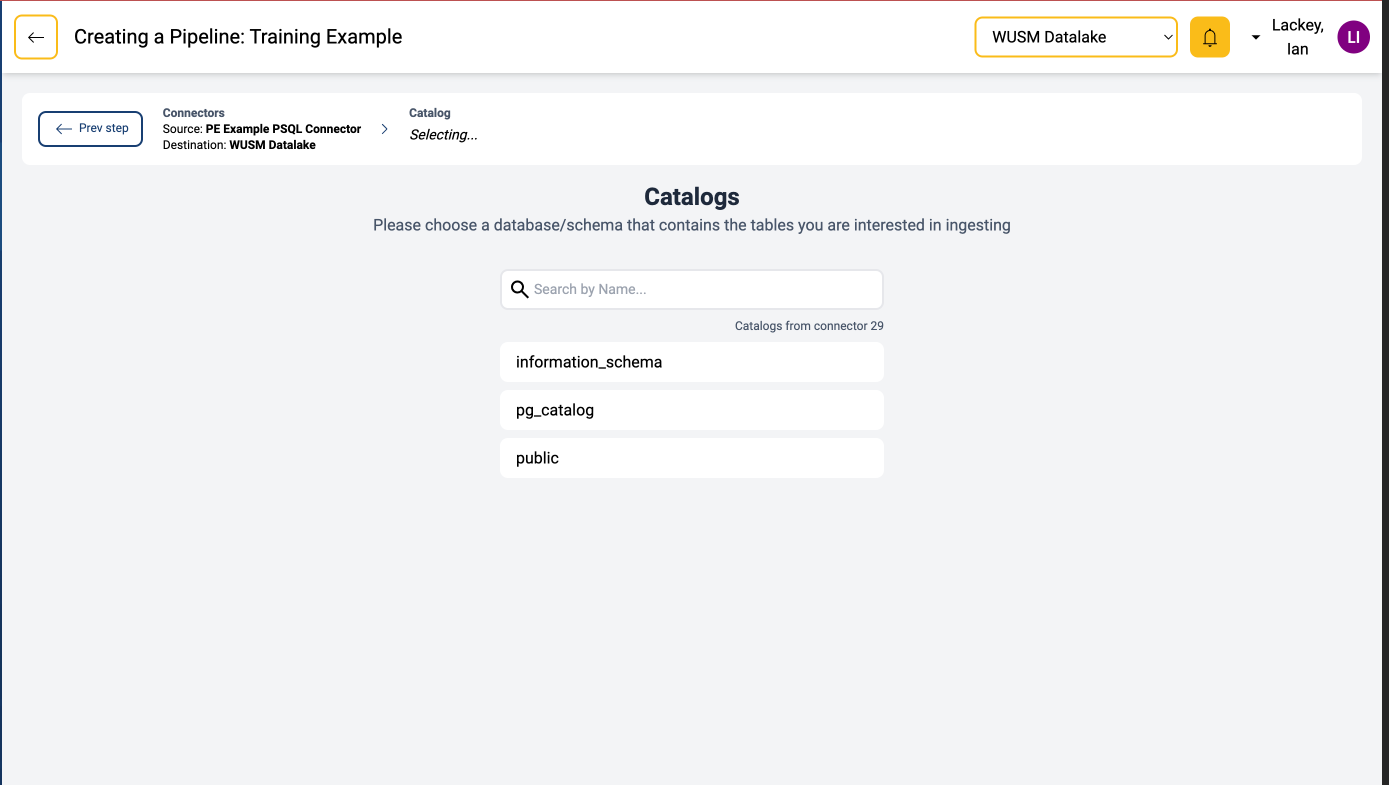
- Source Catalogs
- Find the source catalog (or schema) that you would like to ingest data from.
- Click on the appropriate catalog.
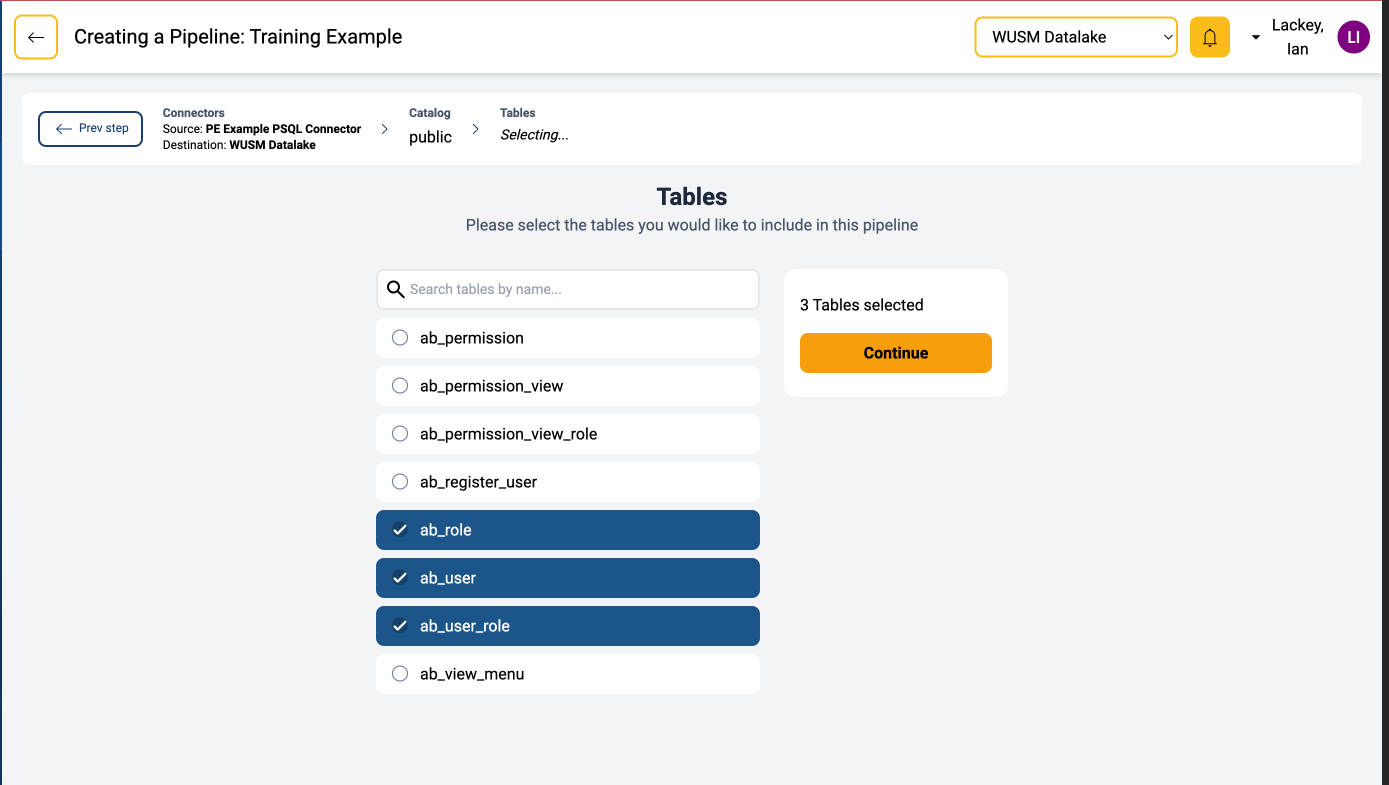
- Source Tables
- Click on the tables you would like to ingest.
- Click the
Continuebutton.
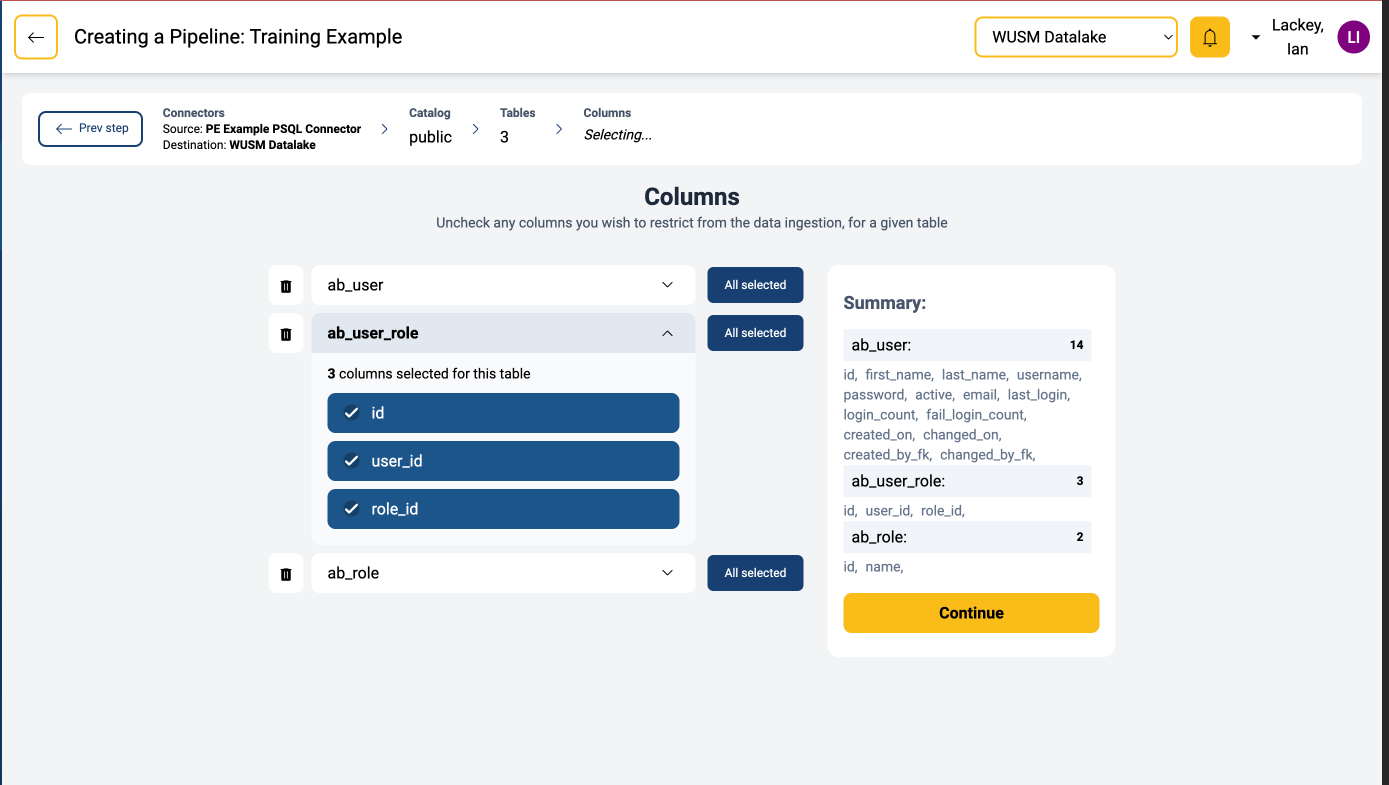
- Source Columns
- Select the columns you would like to ingest for all of the selected tables.
- All columns are select by default. You may toggle all columns on or off by using the
All Selected/Select Allbutton. - Once the appropriate columns are selected, click the
Continuebutton.
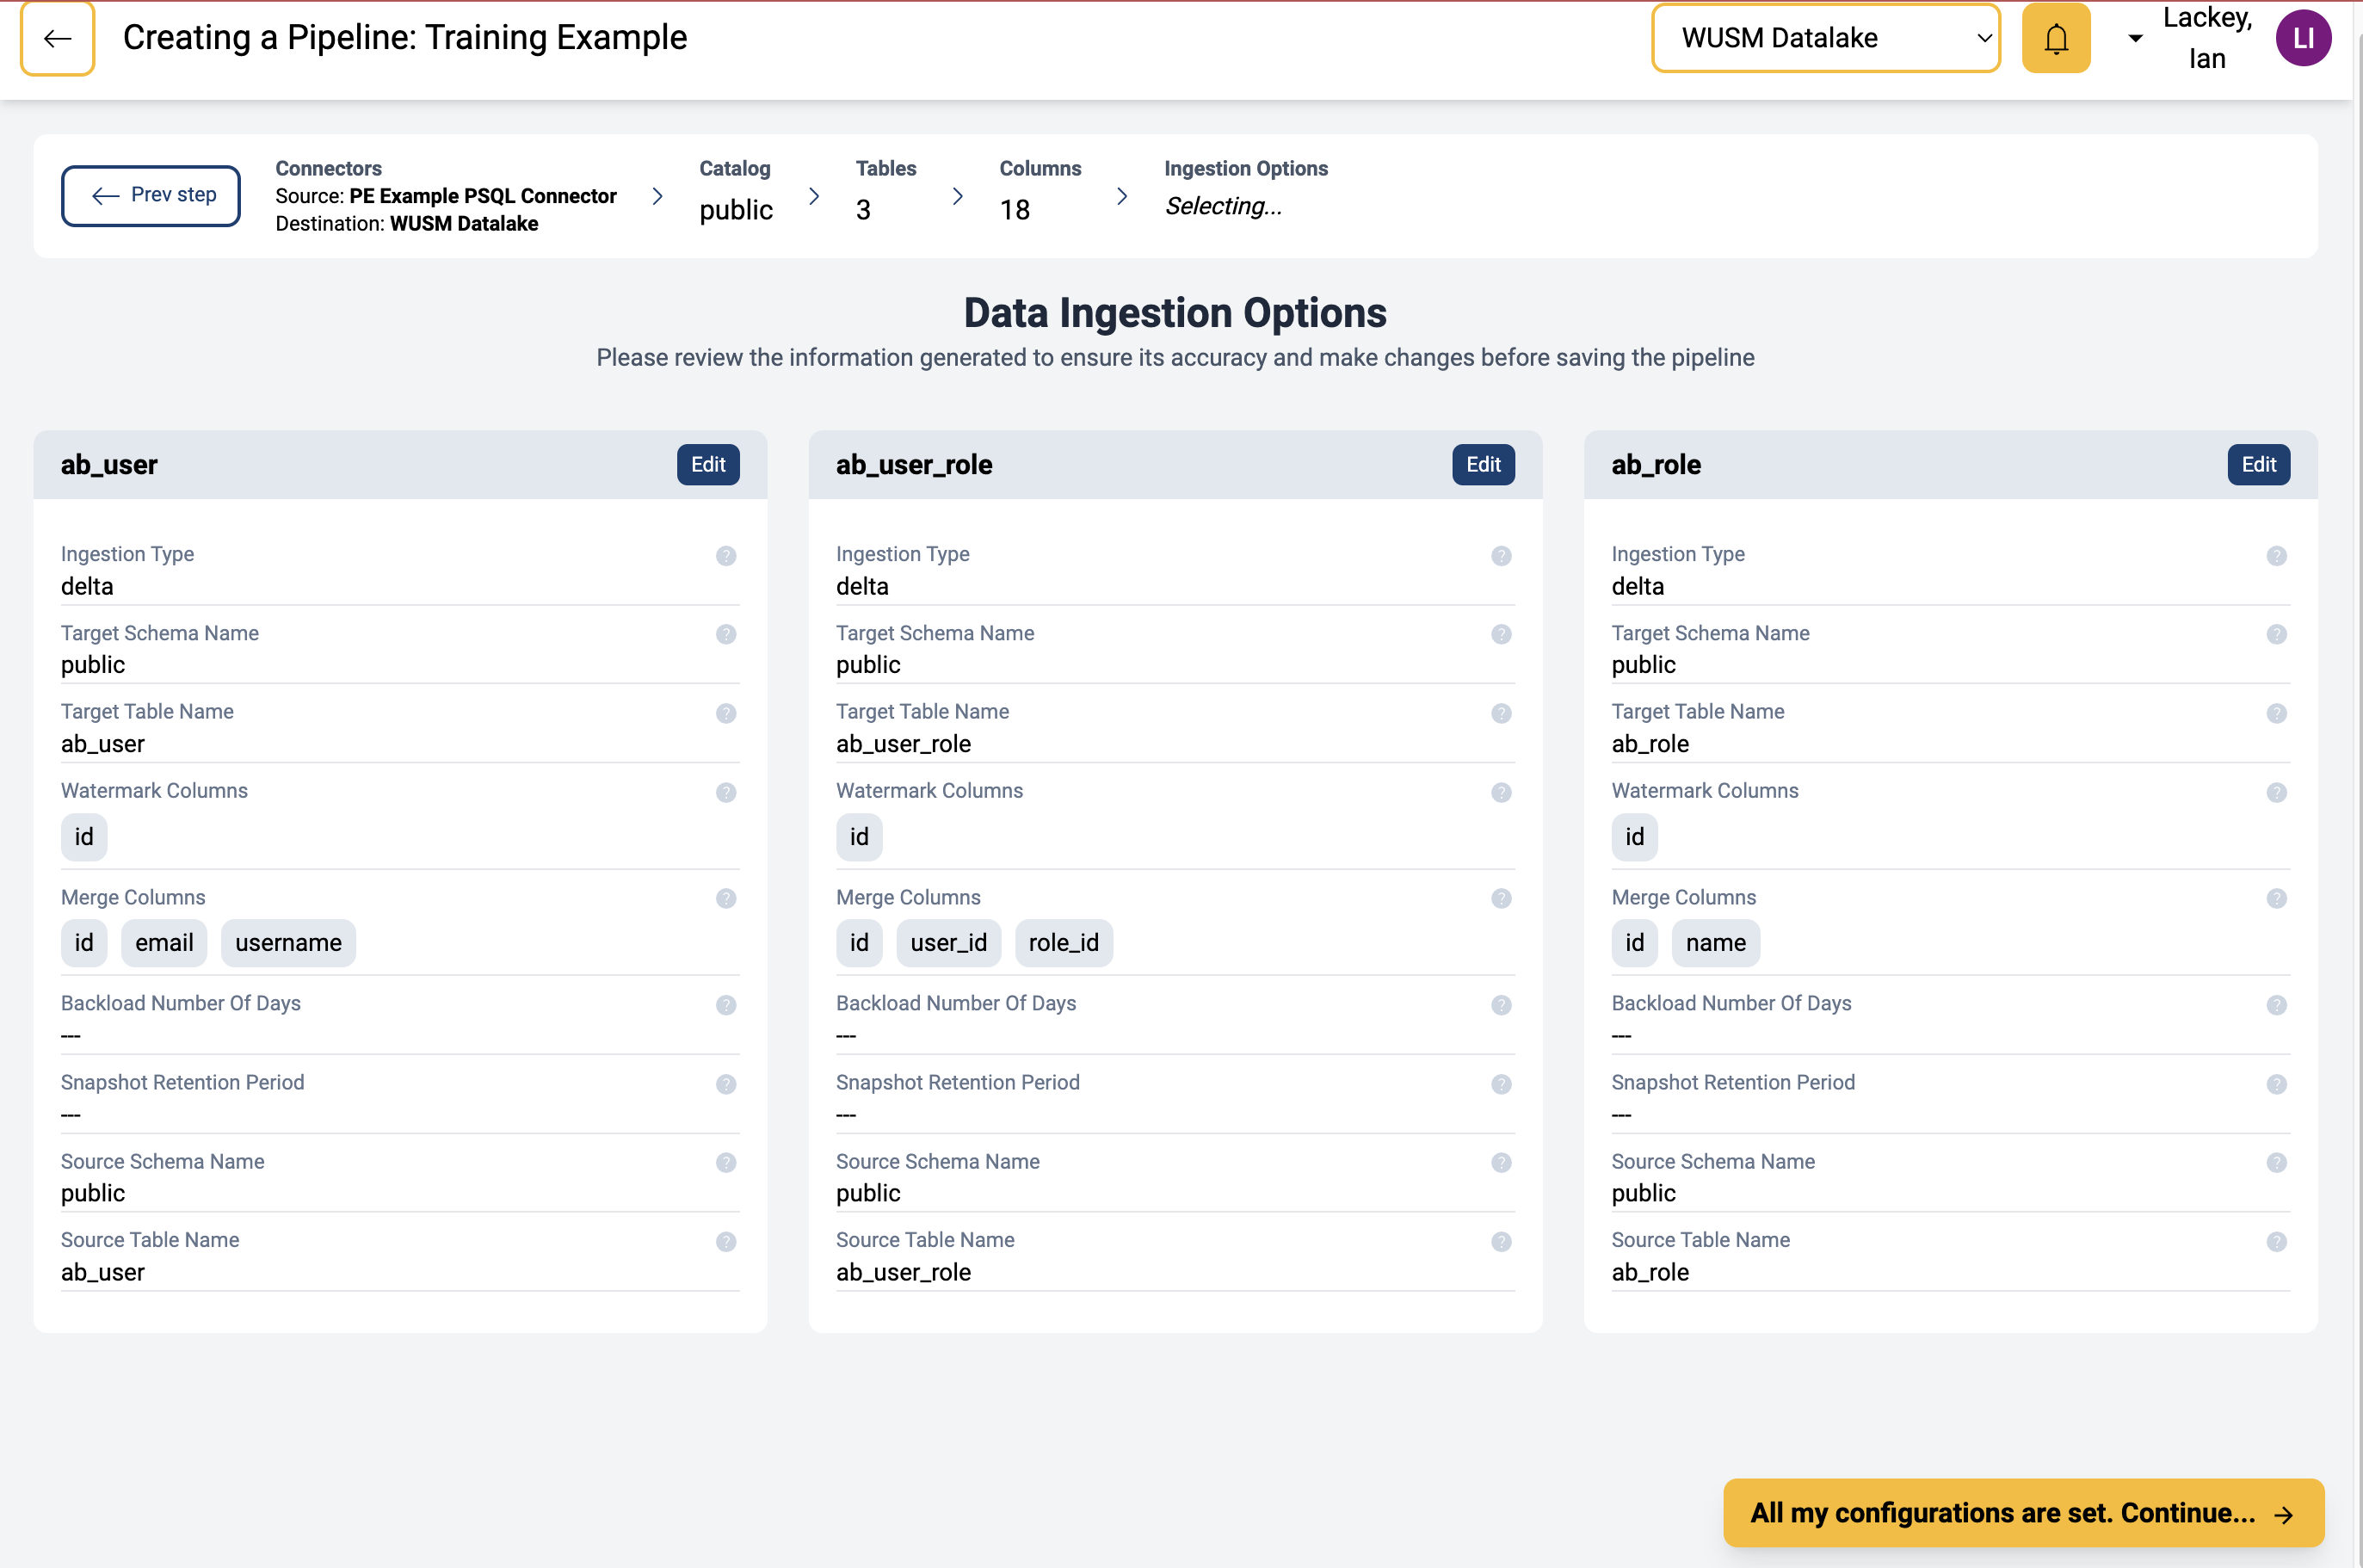
- Data Ingestion Options
- This screen allows you to modify various details of the ingestion process for each table. We will leave the default settings for this guide. However, additional information can be found in the Managing Ingestion Options document.
- Once the options are configured, click on the
All my configurations are set. Continue...button.
- Final Configuration
This screen allows you to modify various details of the ingestion process, such as schedule, visibility etc. We will leave most of the details as the default settings for this guide. One important configuration option that should be entered for each pipeline is theTags. Tags are used to ensure the appropriate team is charged for the usage incurred by the pipeline. Additional information can be found in the Managing Ingestion Options document.- Add billing tags
- Enter
WusmDepartmentas the key - Enter the appropriate department name as the value.
- Click
Add new Tag
Note: Ensure there are no empty tags in the list before clickingFinish. Use theXbutton to remove the empty tag if needed.

- Enter
- Adjust Additional Settings*
- Modify other configuration options as appropriate for the pipeline. Refer to the Managing Ingestion Options document for more information.
- Finish Configuration
- Once the options are configured, click on the
Finishbutton.
- Once the options are configured, click on the
- Add billing tags