


How to Create a Databasin Connectors
This guide provides step-by-step instructions to manage connectors in Databasin. You will learn how to add and configure a new connector to integrate various data sources.
Prerequisites
- You should have an active account on databasin.wustl.edu.
- Basic understanding of database connections and parameters.
Steps
-
Log into Databasin
- Navigate to databasin.wustl.edu and log in with your credentials.
-
Select a Project
- Once logged in, select the project where you want to manage connectors.
-
Navigate to the Connectors Page
- In your project, go to the
Connectorspage.
- In your project, go to the
-
Create a New Connector
- Click on the
New Connectorbutton.
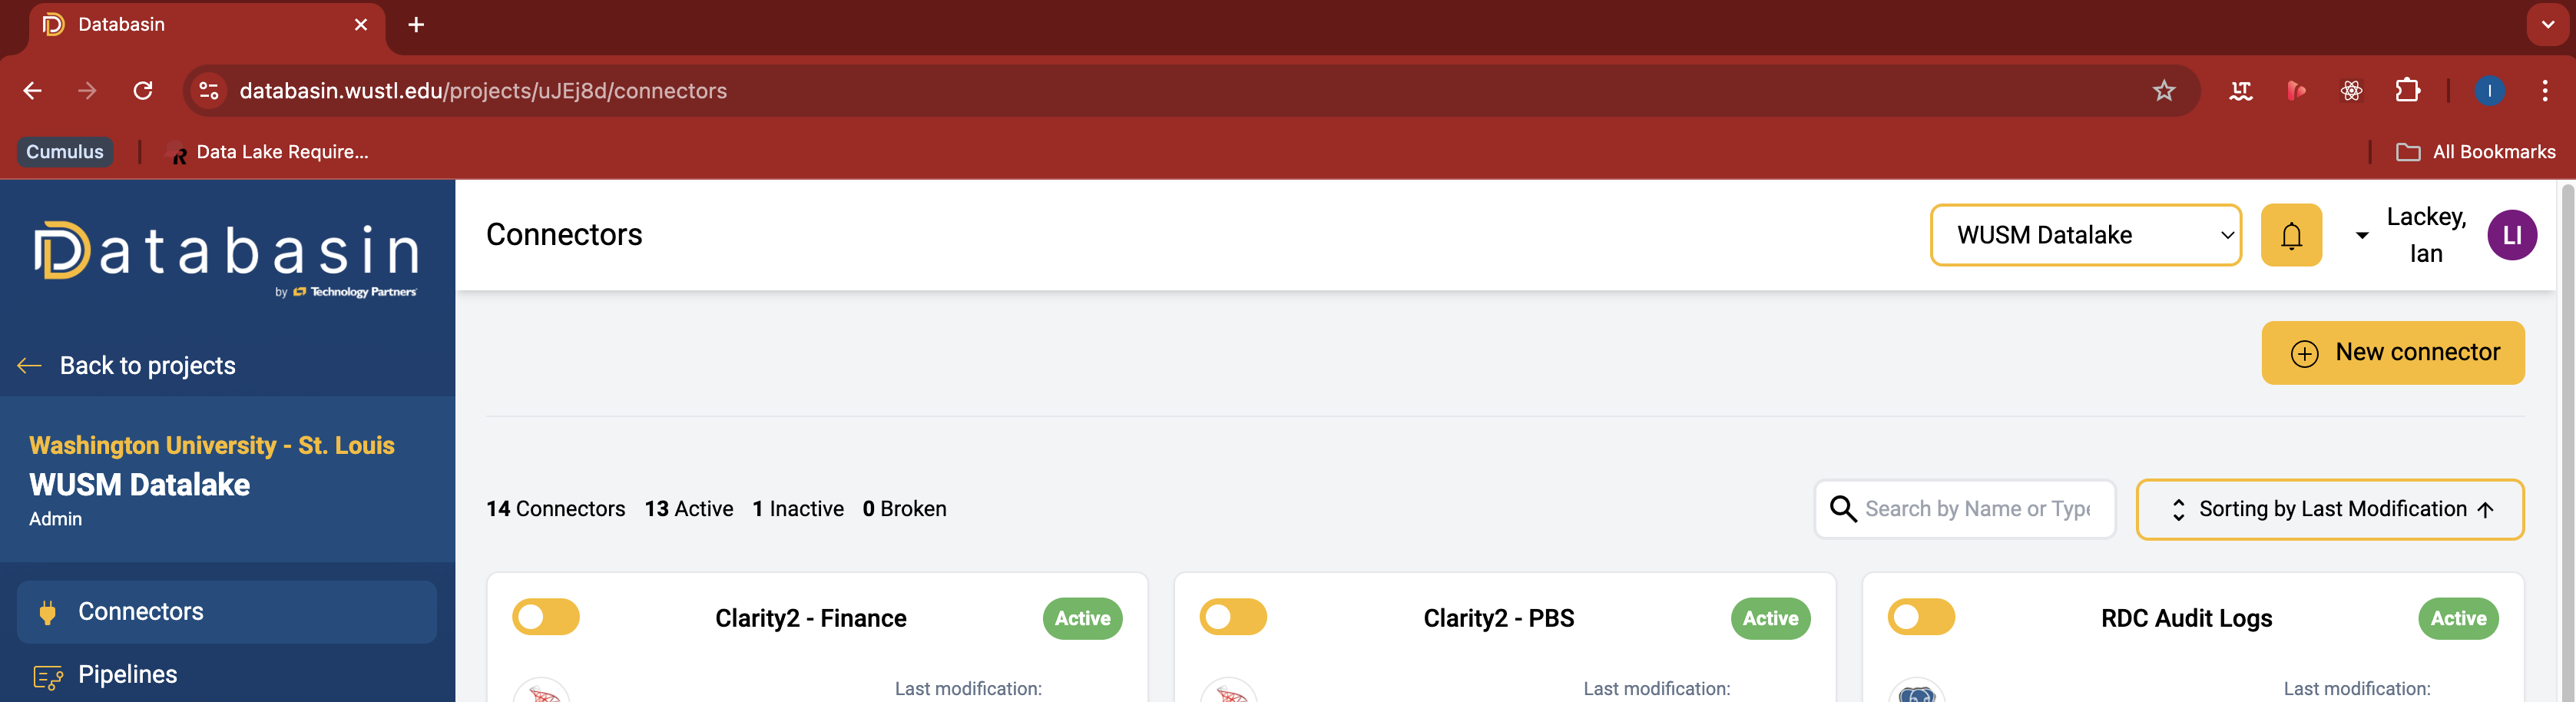
- Click on the
-
Select a Connector Type
- From the available options, select the type of connector you want to create.
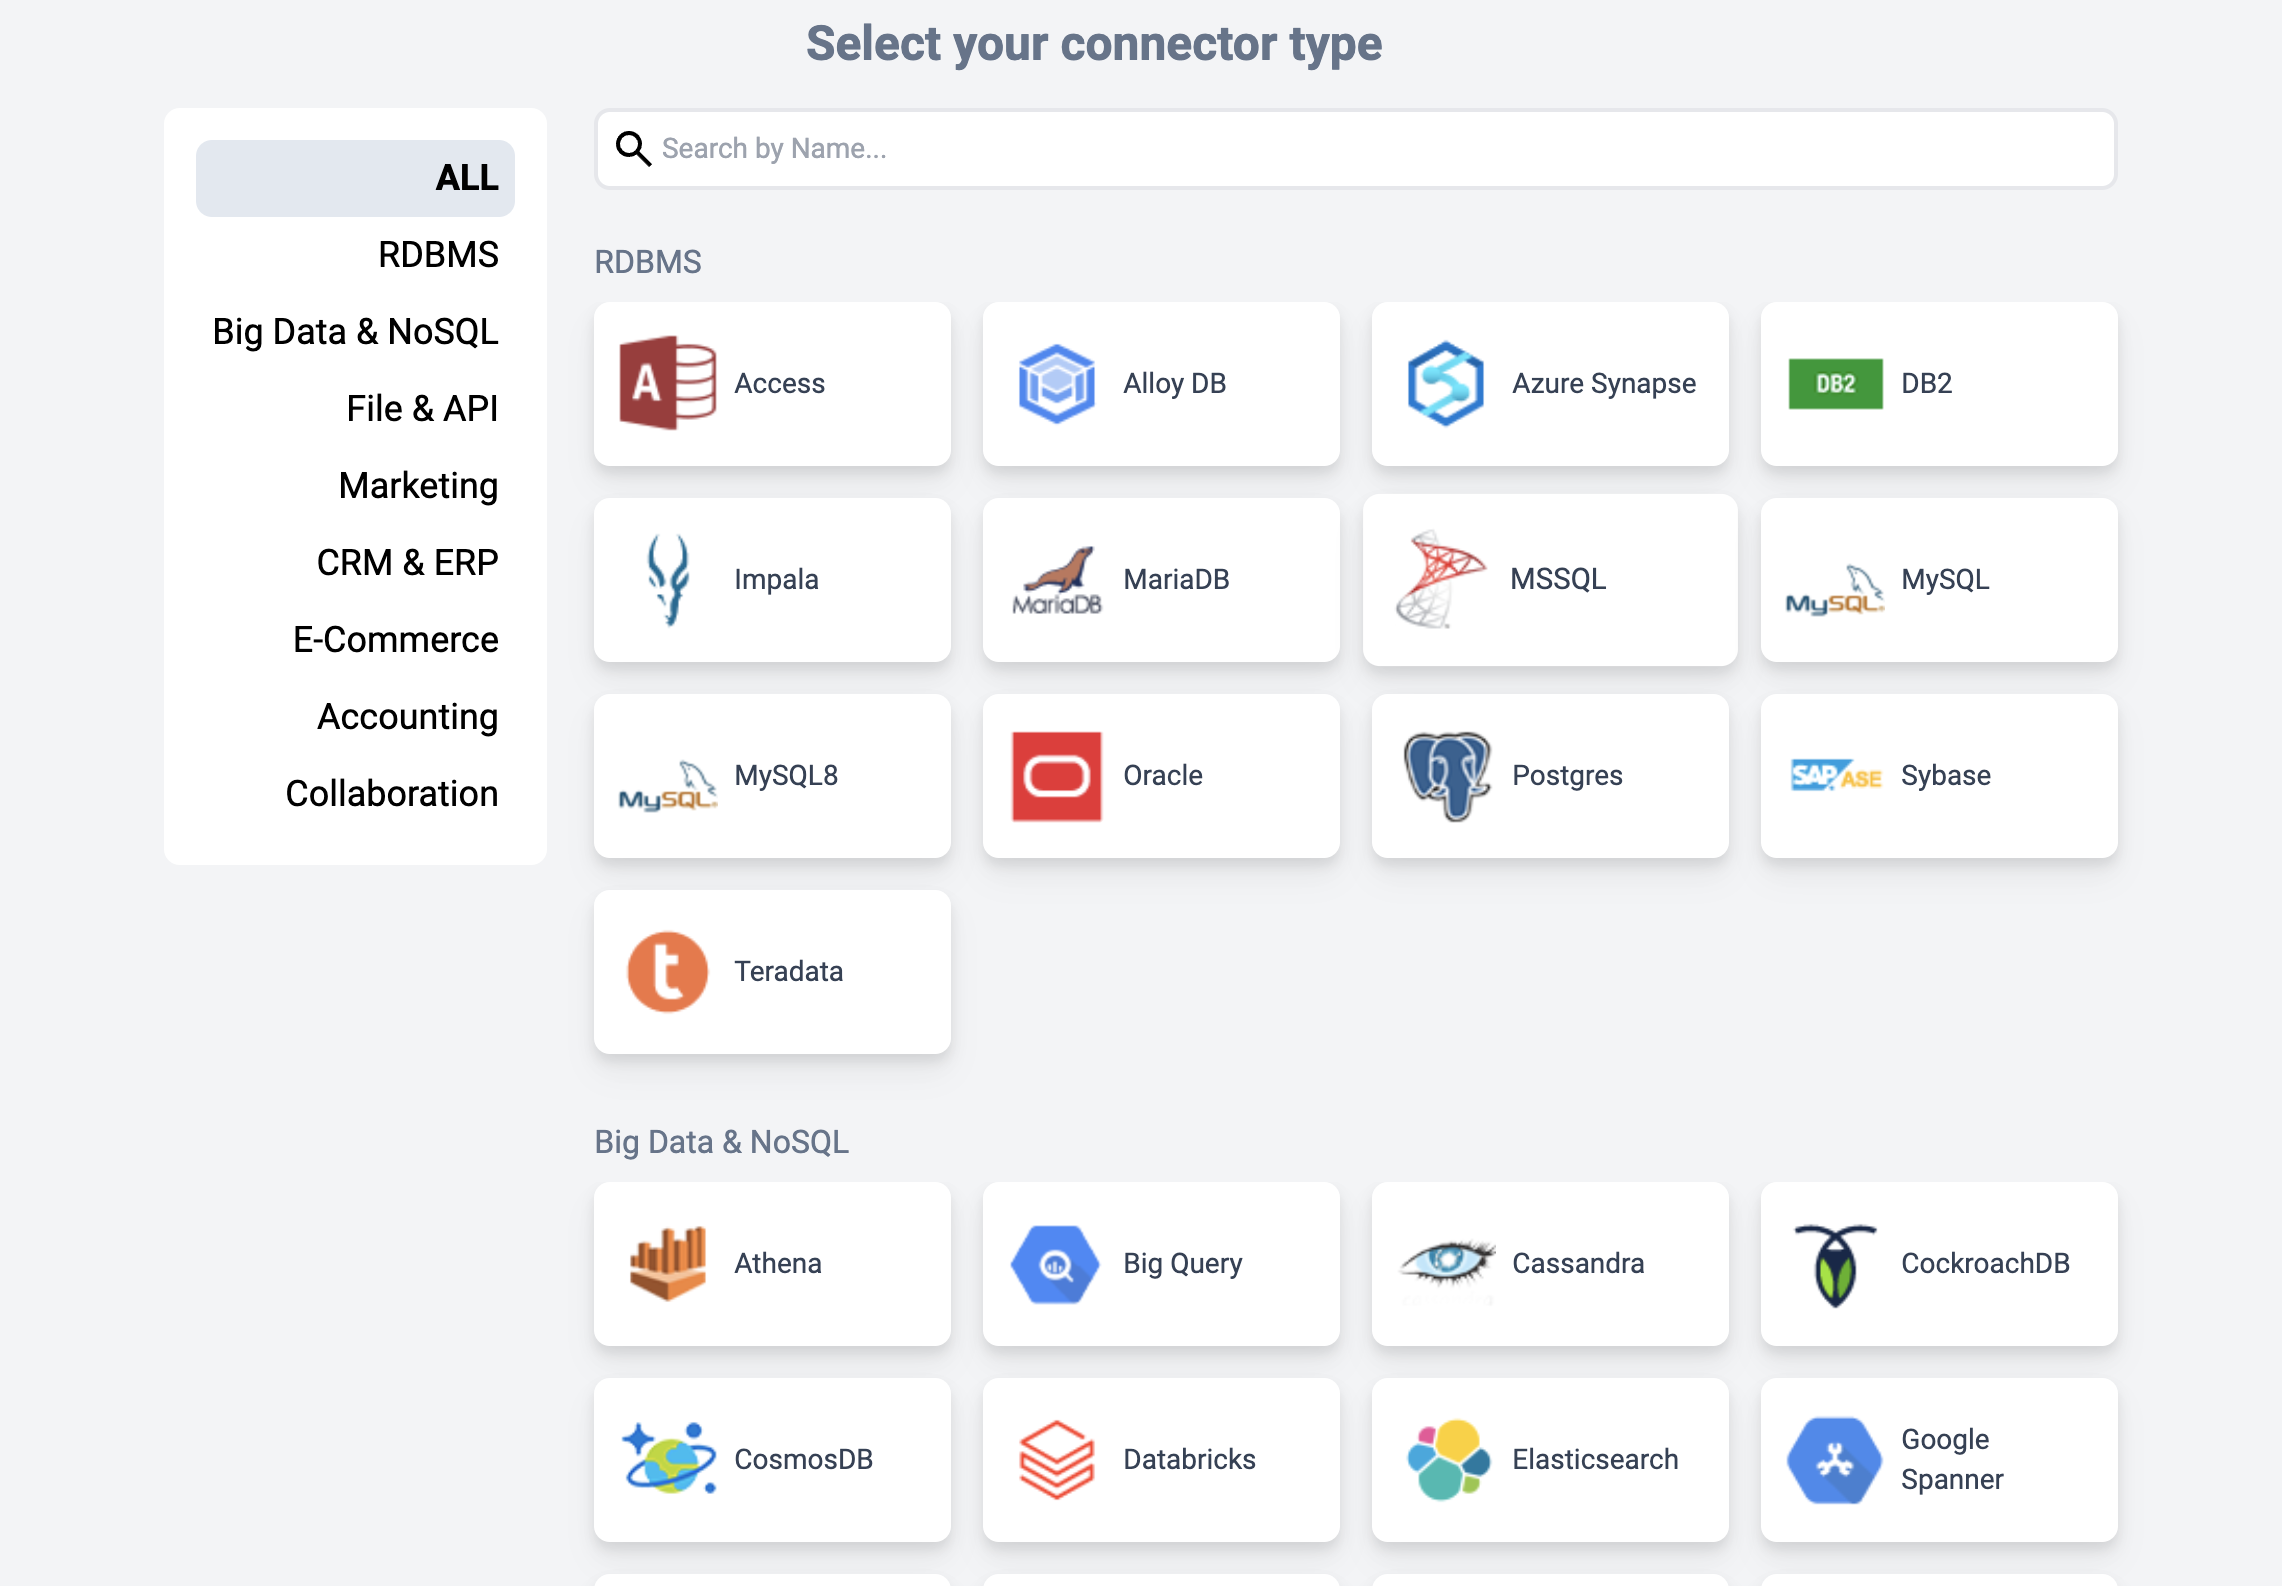
- From the available options, select the type of connector you want to create.
-
Enter Connection Details
- Fill in the necessary connection details specific to your selected connector type.
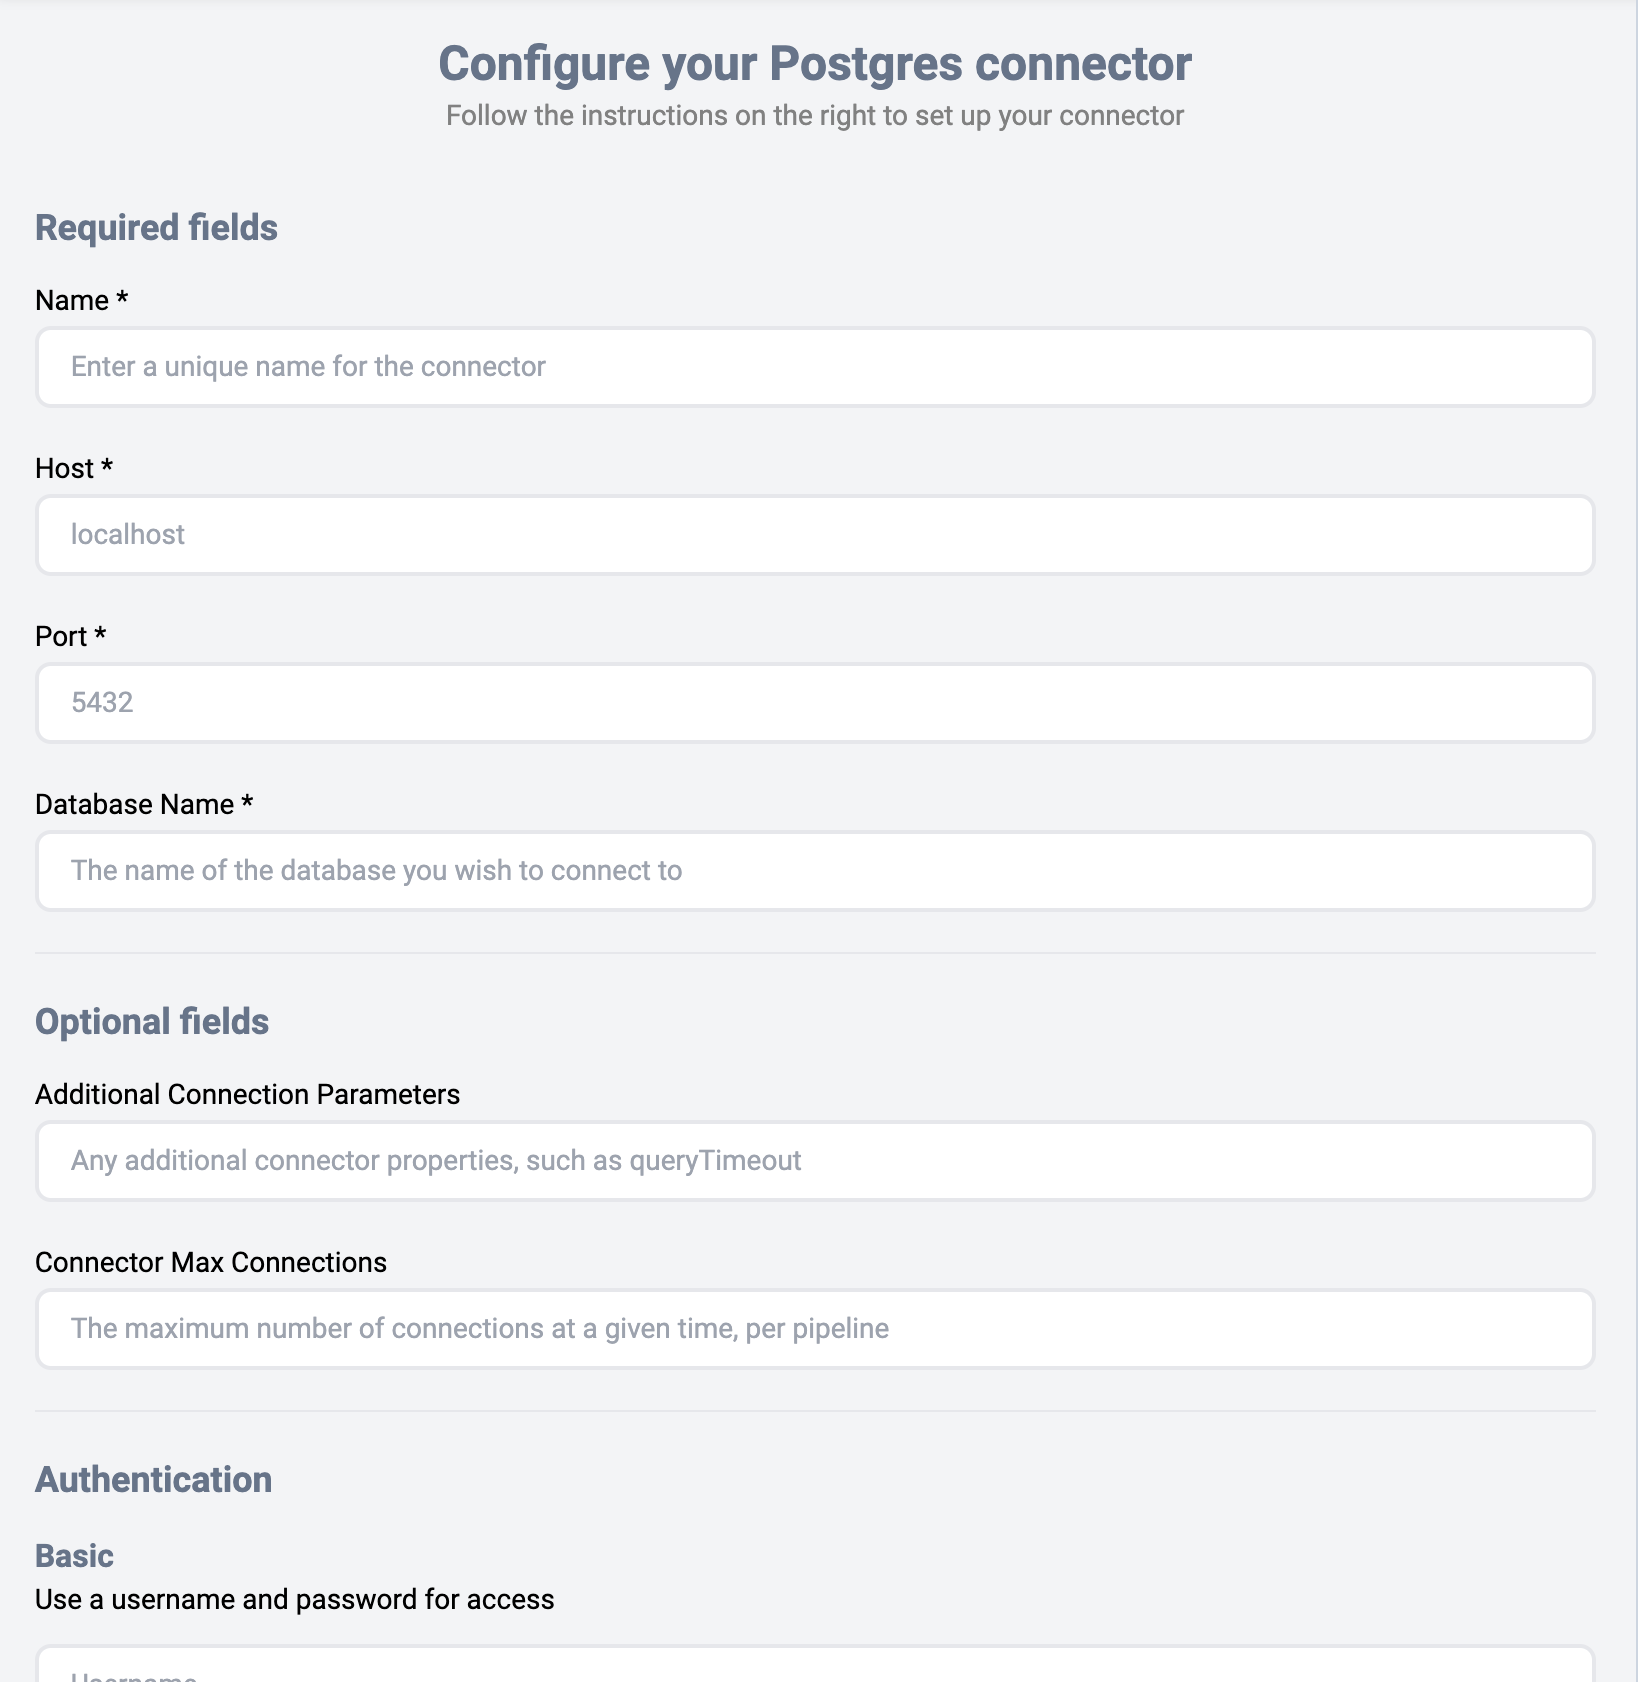
- Fill in the necessary connection details specific to your selected connector type.
-
Add Additional Connection Parameters
- If required, input any additional connection parameters. These should be in JDBC format.
-
Set Maximum Parallel Connections
- Specify the maximum number of parallel connections the connector is allowed to handle.
-
Enter Authentication Details
- Provide the required authentication details (e.g., username, password).
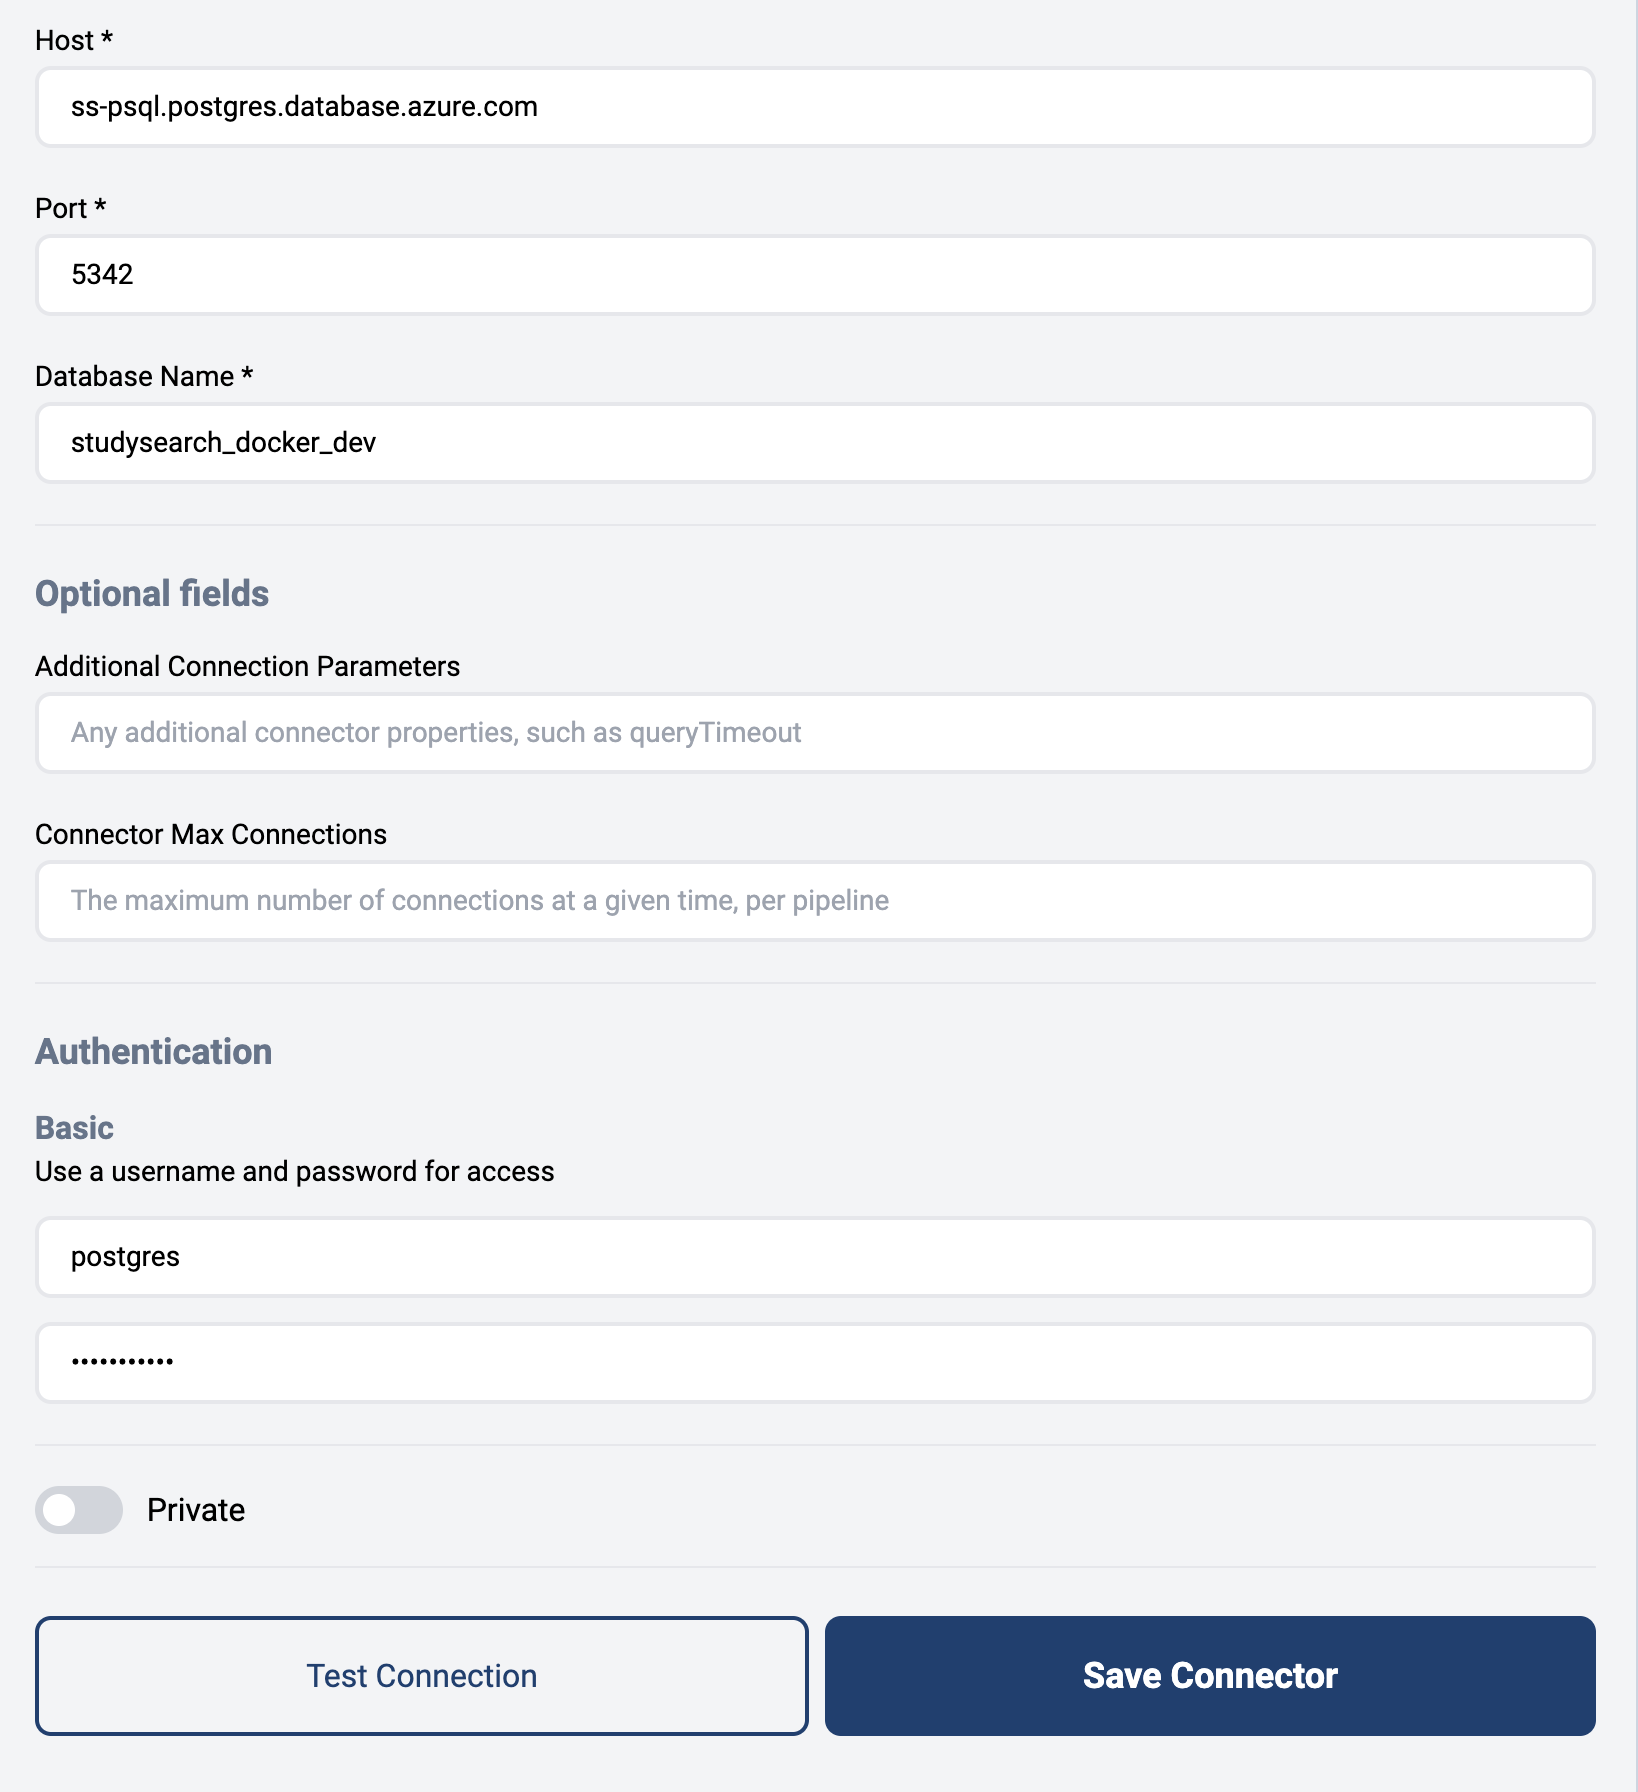
- Provide the required authentication details (e.g., username, password).
-
Test the Connection
- Click the
Test Connectionbutton to verify that the connection details are correct and working. - If the connection is successful, go to the next step. Otherwise, check your connection details and try again.
- If the issue persists, check the Connector Troubleshooting Guide.
- Click the
-
Save Connector
- Click the
Save Connectorbutton to finish creating the connector.
- Click the